Using Nested Router Outlets with NativeScript and Angular
Ever wondered how to navigate two or more separated sections of the screen independently? In this article I will explain how that can be done with the help of named router outlets.
Intro
Sometimes we need only a part the page in our app to change from one component to another, while we want the rest of the page to stay where it is.
Imagine you have a tab-view with multiple tabs and you want each tab to navigate independently of the whole page. You could try to hack that by adding all required components in each tab, then show and hide them with a clever *ngIf. However the moment you add a couple of these you realise that this wasn't such a clever approach after all.This is when Angular comes to the rescue with the magic of named router outlets. The idea is that you can add multiple router-outlets with to your page, give each a unique name and then navigate to each by simply providing the name of the router-outlet and the destination path.
Before we dive into the code. I assume that you have the core knowledge of how to create Angular components, services and how to add these to @NgModule.
The plan
We are going to build an app with one page (HomeComponent), which will contain a tab-view with two tabs. One tab will display a list of dogs (DogsComponent) and when you click on one, you will be redirected to the dogs details view (DogDetailsComponent). The second tab will be very similar except this time we will display a list of cats (CatsComponent) and cat details (CatDetailsComponent).Let's get our hands dirty
We are going to implement our solution in the following steps:- Choose the right router outlet at the root,
- Configure routing for cats and dogs,
- Build navigation for cats using nsRouterLink,
- Build navigation for dogs with code.
Select the root router outlet
Named router outlets work only with router-outlet at the root, as page-router-outlet navigates to a whole different page each time we call navigate.Therefore we need to go to app.component.html and change it to:
<router-outlet></router-outlet>
Configure routing
Since we know what components we will need we are going to start with configuring our routes (see app.routing.ts).We will need to configure the routes for cat and dog related components are configured as children of the home route.
Also each of these children routes will need an outlet property, which will indicate which router-outlet this route belongs to. So each cat component should be assigned to 'catoutlet', while each dog component should be assigned to the 'dogoutlet'.
[Note] the outlets names don't need to include the word outlet, however the name should contain only alpha-numeric characters. For example 'cat-outlet' will not work.
Additionally we can select which components to show by default when the app loads for the first time. This can be done by changing the redirectTo property on the default route. In our case we want to show CatsComponent and DogsComponent first, so our redirectTo should be '/home/(catoutlet:cats//dogoutlet:dogs)'
[Note] If you needed to navigate to CatDetails by default, you could set redirectTo to '/home/(catoutlet:cats/Betsy//dogoutlet:dogs)' or '/home/(catoutlet:cats/Betsy)'
const routes: Routes = [
  { path: '', redirectTo: '/home/(catoutlet:cats//dogoutlet:dogs)', pathMatch: 'full' },
  { path: 'home', component: HomeComponent, children: [
    { path: 'cats', component: CatsComponent, outlet: 'catoutlet'},
    { path: 'cats/:name', component: CatDetailsComponent, outlet: 'catoutlet'},
    { path: 'dogs', component: DogsComponent, outlet: 'dogoutlet'},
    { path: 'dogs/:id', component: DogDetailsComponent, outlet: 'dogoutlet'}
  ]}
];
Configure router-outlet's
Now let's implement the home component.This component will serve us as a simple container for two both router-outlets. So the HomeComponent class is rather empty.
The whole magic will happen in the HomeComponent template, which should contain a tab view with two instances of a named router-outlet.
Naming a router-outlet is as simple as setting the name property. Following the routes configuration, we need to name the router-outlets "catoutlet" and "dogoutlet".
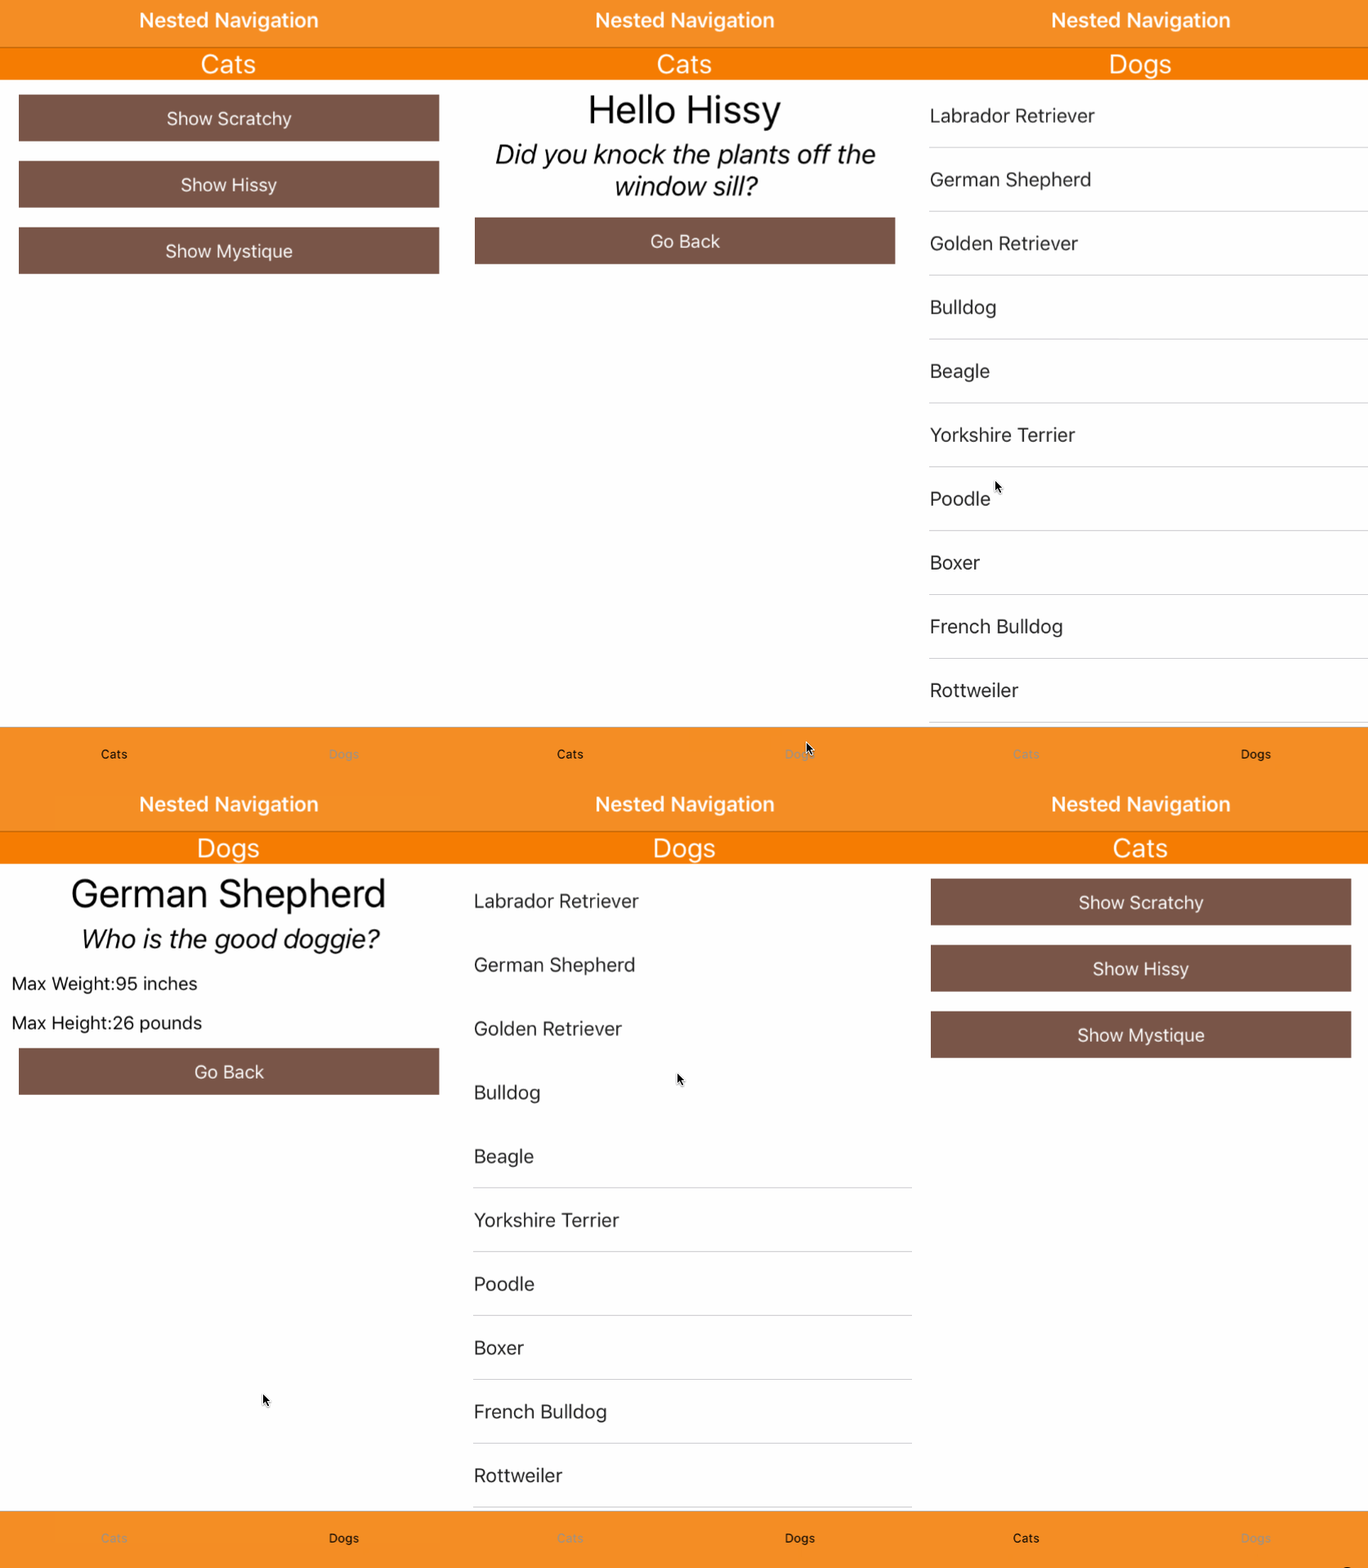
TabView example
<ActionBar title="Nested Navigation" class="action-bar"></ActionBar>
<TabView class="tab-view">
  <StackLayout *tabItem="{title: 'Cats'}">
    <router-outlet name="catoutlet"></router-outlet>
  </StackLayout>
  <StackLayout *tabItem="{title: 'Dogs'}">
    <router-outlet name="dogoutlet"></router-outlet>
  </StackLayout>
</TabView>
Here is what you should expect:

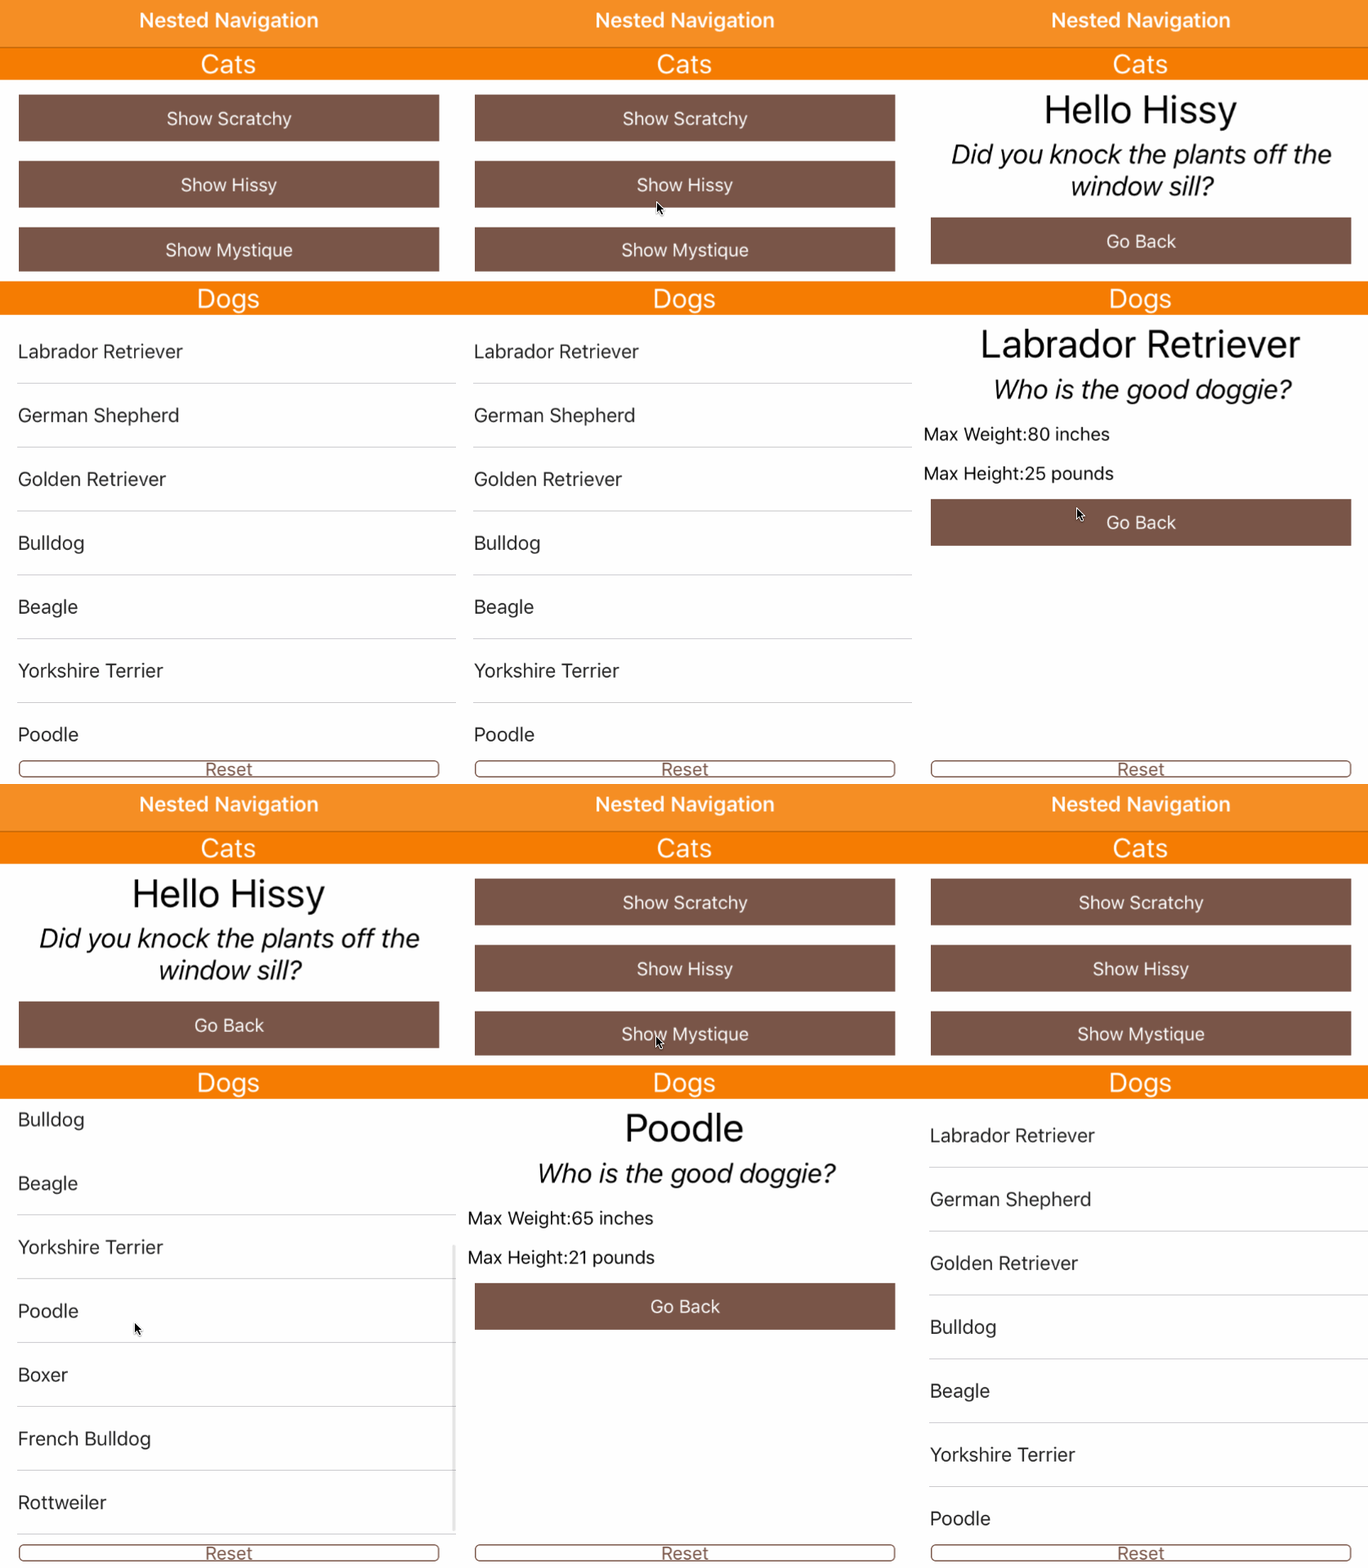
GridLayout example:
TabView will only show only one view at the time. To show both cats and dogs we can put both in a grid like this:<GridLayout rows="*, 2*" class="page">Here is what you should expect:
<StackLayout row="0">
<Label text="Cats" class="h2 text-center action-bar"></Label>
<router-outlet name="catoutlet"></router-outlet>
</StackLayout>
<StackLayout row="1">
<Label text="Dogs" class="h2 text-center action-bar"></Label>
<router-outlet name="dogoutlet"></router-outlet>
</StackLayout>
</GridLayout>

[nsRouterLink] navigation for Cats
Now let's implement CatsComponent and CatDetailsComponent.The CatsComponent template is quite simple. It should have a bunch of buttons each navigating to CatDetailsComponent with a name of a cat as a parameter.
To do that we need to use nsRouterLink with the following parameters:
- path to the parent router-outlet (in this case it is '/home')
- outlets configuration, with the name of the outlet we want to update (in this case it is catoutlet) plus the route for the outlet (in this case ['cats', 'cats-name'])
Like this:
<ButtonNow we just need to create CatsDetailComponent, which will display the name of the cat and allow the user to navigate back.
text="Show Scratchy"
[nsRouterLink]="['/home', { outlets: { catoutlet: ['cats', 'Scratchy'] } } ]">
</Button>
<Button
text="Show Hissy"
[nsRouterLink]="['/home', { outlets: { catoutlet: ['cats', 'Hissy'] } } ]">
</Button>
<Button
text="Show Mystique"
[nsRouterLink]="['/home', {outlets: { catoutlet: ['cats', 'Mystique']}}]">
</Button>
To extract the name we should add ngOnInit() with the injected ActivateRoute to CatDetailsComponent class.
ngOnInit() {
  this.name = this.route.snapshot.params['name'];
}
Then the CatDetailsComponent template should be rather simple.We need to:
- display the cats name with some message:
<Label [text]="'Hello ' + name"></Label>- display a back button which will use nsRouterLink to navigate back.
<Label text="Did you knock the plants off the window sill?" textWrap="true"></Label>
<ButtonAnd voila! That is all we need to do, to navigate inside catoutlet with nsRouterLink.
text="Go Back"
[nsRouterLink]="['/home', { outlets: { catoutlet: ['cats'] } } ]">
</Button>
Code navigation for Dogs
For the dogs part of the app we will navigate with code, by using the navigate function of the Router service from @angular/router (you know the drill - just import it and then inject it in the constructor).In the DogsComponent class we need a function that takes dog's id and then navigate to DogDetailsComponent.
navigate() takes exactly the same parameters as nsRouterLink, just this time we will use dogoutlet.
navigateToDetails(id: number) {
  this.router.navigate([
    '/home', { outlets: { dogoutlet: ['dogs', id] } }
  ])
}
Then in the DogsComponent template we just need to create a list view and add an on tap event that will call navigateToDetails.<ListView [items]="dogs" class="list-group" height="100%">
<template let-item="item" >
<Label
(tap)="navigateToDetails(item.id)"
[text]="item.name"
class="list-group-item">
</Label>
</template>
</ListView>
Now to complete the example we just need to add a goBack() function to DogDetailsComponent class, which again will use Router from @angular/router.
goBack() {
  this.router.navigate([
    '/home', { outlets: { dogoutlet: ['dogs'] } }
  ])
}
Then in DogsDetailsComponent template we just need to:- display the info on the dog:
<Label [text]="dog.name"></Label>- add back button:
<Label text="Who is the good doggie?"></Label>
<Label [text]="'Max Weight:' + dog.maxWeight + ' inches'"></Label>
<Label [text]="'Max Height:' + dog.maxHeight + ' pounds'"></Label>
<Button text="Go Back" (tap)="goBack()"></Button>
Navigating multiple outlets
You can also navigate to more than one outlet in a single call.
Just simply provide all outlets you want to update in the outlet param.
For examle we can add a reset button that will navigate to the default of cats and dogs views just do it like this:
<Button
  text="Reset"
  [nsRouterLink]="['/home', { outlets: { catoutlet: ['cats'], dogoutlet: ['dogs'] } } ]">
</Button>
The code
You can find the whole solution in my github
nativescript-nested-router