Using NativeScript Animations
Animations were the single most requested feature in our idea portal, so I think it's safe to say that animations landing in our 1.3 release was kind of a big deal. Now that animations are here, let's look at how to use NativeScript's new animation APIs, and how to create some practical effects you can add to your apps.
Animations were the single most requested feature in our idea portal, so I think it's safe to say that animations landing in our 1.3 release was kind of a big deal. Now that animations are here, let's look at how to use NativeScript's new animation APIs, and how to create some practical effects you can add to your apps.
The animate method
There are a few different ways you can create animations in NativeScript, but let's start with the simplest: animating a single UI component. To create such an animation, all you need to do is select a view (aka a UI component) by its id, and call that view's animate() method. For example, the following code selects a <Label> component, and moves it 100 pixels to the right and bottom over three seconds:
<Page loaded="loaded">
<StackLayout>
<Label id="message" text="Hello NativeScript!" />
</StackLayout>
</Page>
exports.loaded = function(args) {
var page = args.object;
var message = page.getViewById("message");
message.animate({
translate: { x: 100, y: 100 },
duration: 3000
});
};
And here's what that animation looks like on iOS and Android.


In addition to translation, which the example above uses, you can also animate opacity, background color, scale, and rotation. To configure those animations, you can additionally pass animate() a delay, a duration, an iterations count, and a curve. (Check out the docs for details on how these properties work.)
The animate() method returns an ES6 promise object, therefore it's easy to chain animations using built-in JavaScript semantics. For instance the following animation moves the label, and then changes its opacity to fade it off the screen:
message.animate({
translate: { x: 100, y: 100 },
duration: 1000
}).then(function() {
return message.animate({
opacity: 0,
duration: 1000
});
});
And here's what that animation looks like on iOS and Android.

There are other powerful things you can do with NativeScript's animation APIs, such as animating multiple UI components at the same time, as well as animating multiple properties at once, but for the rest of this article I want to focus on practical uses of animations in NativeScript apps. After all, just because you can make a box rotate infinitely doesn't mean that you should.
Fading elements in
Fading elements in is a great way to add a little polish to your apps whenever you need to introduce new UI elements to the screen. A good fade in is long enough to draw the user's eye, but short enough to avoid getting in their way—usually around one full second.
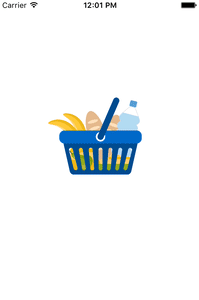
As an example I recently changed the NativeScript Groceries sample to use a fade in effect when the grocery list loads from the backend database. You can see a before (left) and after (right) below:


In NativeScript creating a fade in effect is as easy as setting a UI component's opacity to 0 (usually in CSS), and then animating the opacity to 1 using the animate() method. In the case of Groceries I set the <ListView> in question to opacity: 0 in CSS:
ListView {
opacity: 0;
}
And then I faded in the same <ListView> after I filled it with data from the Groceries backend.
exports.loaded = function(args) {
page = args.object;
// Retrieve data from the backend and fill the ListView
groceryList.load().then(function() {
// Fade in the ListView over 1 second
page.getViewById("groceryList").animate({
opacity: 1,
duration: 1000
});
});
};
Note: If you're curious how the activity indicator works in this same example, check out the ActivityIndicator section in the new NativeScript getting started guide.
Splash screens
Splash screens can be a fun way to showcase your app's branding while your app performs some startup processing. As an example, Twitter's iOS app garnered some attention by adding a pretty slick startup animation earlier this year.
If you look at the Twitter animation closely, you'll see that this animation is mostly a scale change; therefore, it's relatively easy to recreate this animation in NativeScript.
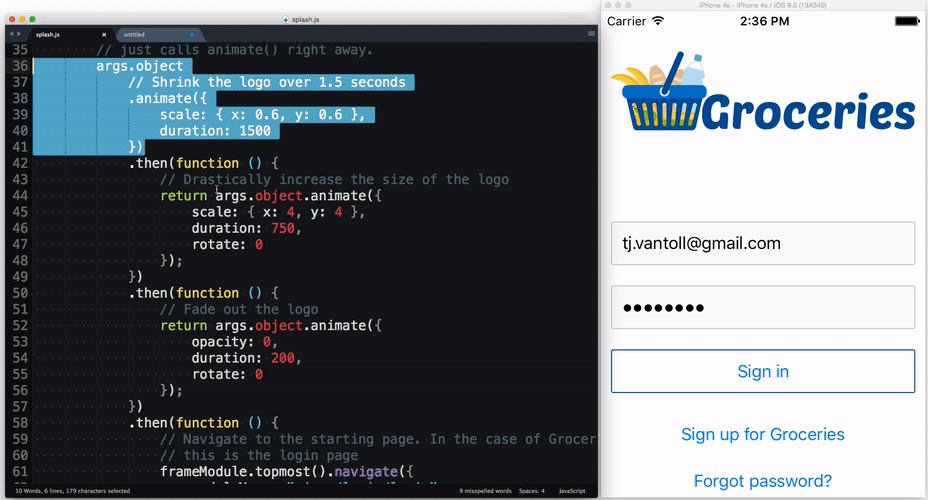
Let's look at the code first, and then we'll dive into how it all works. The code below contains the XML behind the splash screen animation, which is basically a simple <GridLayout> that takes up the entirety of the page.
The real magic happens in this page's code-behind file, which is listed below with comments to explain what's going on.
var frameModule = require("ui/frame");
var imageModule = require("ui/image");
exports.loaded= function(args) {
// Hide the iOS UINavigationBar so it doesn't get in the way of the animation
if (frameModule.topmost().ios) {
frameModule.topmost().ios.navBarVisibility = "never";
}
// Create a new image
var item = new imageModule.Image();
// Set the image's source to a file named “icon” in the
// project's App_Resources folder. For more information on
// how these image paths work refer to the images section
// on the NativeScript getting started guide
item.src = "res://icon";
// The actual image file is large so that it looks good when scaled.
// This shrinks the starting height of the image to a reasonable size.
item.height = 150;
// Attach an event handler that runs after the image loads.
// (We don't want the animation to kick off until the image is ready.)
item.on("loaded", function (args) {
// Kick off the animations. In a more realistic scenario, you may want to
// perform some backend processing while the splashscreen is up before
// your first call to animate(). But for simplicity's sake this example
// just calls animate() right away.
args.object
// Shrink the logo over 1.5 seconds
.animate({
scale: { x: 0.6, y: 0.6 },
duration: 1500
})
.then(function () {
// Drastically increase the size of the logo
return args.object.animate({
scale: { x: 4, y: 4 },
duration: 750
});
})
.then(function () {
// Fade out the logo
return args.object.animate({
opacity: 0,
duration: 200
});
})
.then(function () {
// Navigate to the starting page. In the case of Groceries.
// this is the login page
frameModule.topmost().navigate({
moduleName: "views/login/login",
animated: false
});
});
});
page = args.object;
// Append the dynamically created image to the <GridLayout>
var grid = page.getViewById("grid");
grid.addChild(item);
};
This example is a good demonstration of how elegant code that chains multiple animate() calls together can be. The first call to animate() shrinks the logo; the second increases its size; the third fades the logo off the screen; and the final then() handler navigates the user to the first page of the app. Here's what this splash screen looks like on iOS using the Groceries logo:
The readable nature of the animate() code makes it easy to tinker with these APIs, especially when using NativeScript's livesync command. In the gif below I use tns livesync ios --emulator --watch to experiment with some alternative versions of this animation—one that brings the logo in from the bottom of the screen, and another that adds a bit of rotation.
Jen Looper, whom by the way came up with this splash screen idea, uses a similar technique in her School Bell Weather app:
Wrapping up
In this article I gave a few examples of what you can do with the new NativeScript animation APIs, but the sky is the limit. For further inspiration, make sure to check out the NativeScript animation demo application on GitHub.
What sort of things have you created with NativeScript animations? Let us know in the comments.