Renderless Components in NativeScript-Vue
Learn about Renderless Components in NativeScript-Vue
My favorite thing about NativeScript-Vue is that we get to leverage two amazing frameworks: NativeScript and Vue.js. It is like having two great things: peanut butter and jelly, and then discovering that mixing them in a sandwich results in something so much better!
My latest "discovery" in the Vue.js world is the so-called Renderless Components. They are awesome! But when I mixed them with NativeScript... what a delicious combination!
What are Renderless Components?
Renderless Components are Vue components that implement some logic or behavior but leave the visual interface implementation to their children. In the web world, it means that Renderless Components do not provide any HTML or CSS. It may seem that they are not that useful, but in practice, Renderless Components have several advantages.
Firstly, they don't lock you to a concrete UI. It happens often to UI libraries that, as they grow in popularity, their APIs also grow to comprise every alternative behavior or UI tweak such as colors, classes, show/hide elements, etc. With Renderless Components, the users of the library have total freedom to implement the UI as they want. They don't lock you to a UI framework either, so you can keep using Bootstrap, Bulma or whatever you are using through the rest of the code.
Instead, Renderless Components will implement repetitive behavior or logic, and just focus on doing that one thing well. As we explore some examples in this article, you will see what I mean. Renderless Components also allow adding behavior to the Vue <template> in a declarative way instead of imperative JavaScript code.
The secret to Vue.js Renderless Components lies in scoped slots. Scoped slots is a mechanism that allows a component to send data to its slots. If, instead of data, the parent component sends a callback function, now the client slot can communicate with the parent component. So, in practice, scoped slots enable two-way communication between components and slots.
If you wish to learn more about Renderless Components and how to build them, check out this article on CSS Tricks and this article by Adam Wathan.
All this theory is explained better with real code. Check out the following examples.
Look Ma! No JavaScript!
See the full demo on Playground.

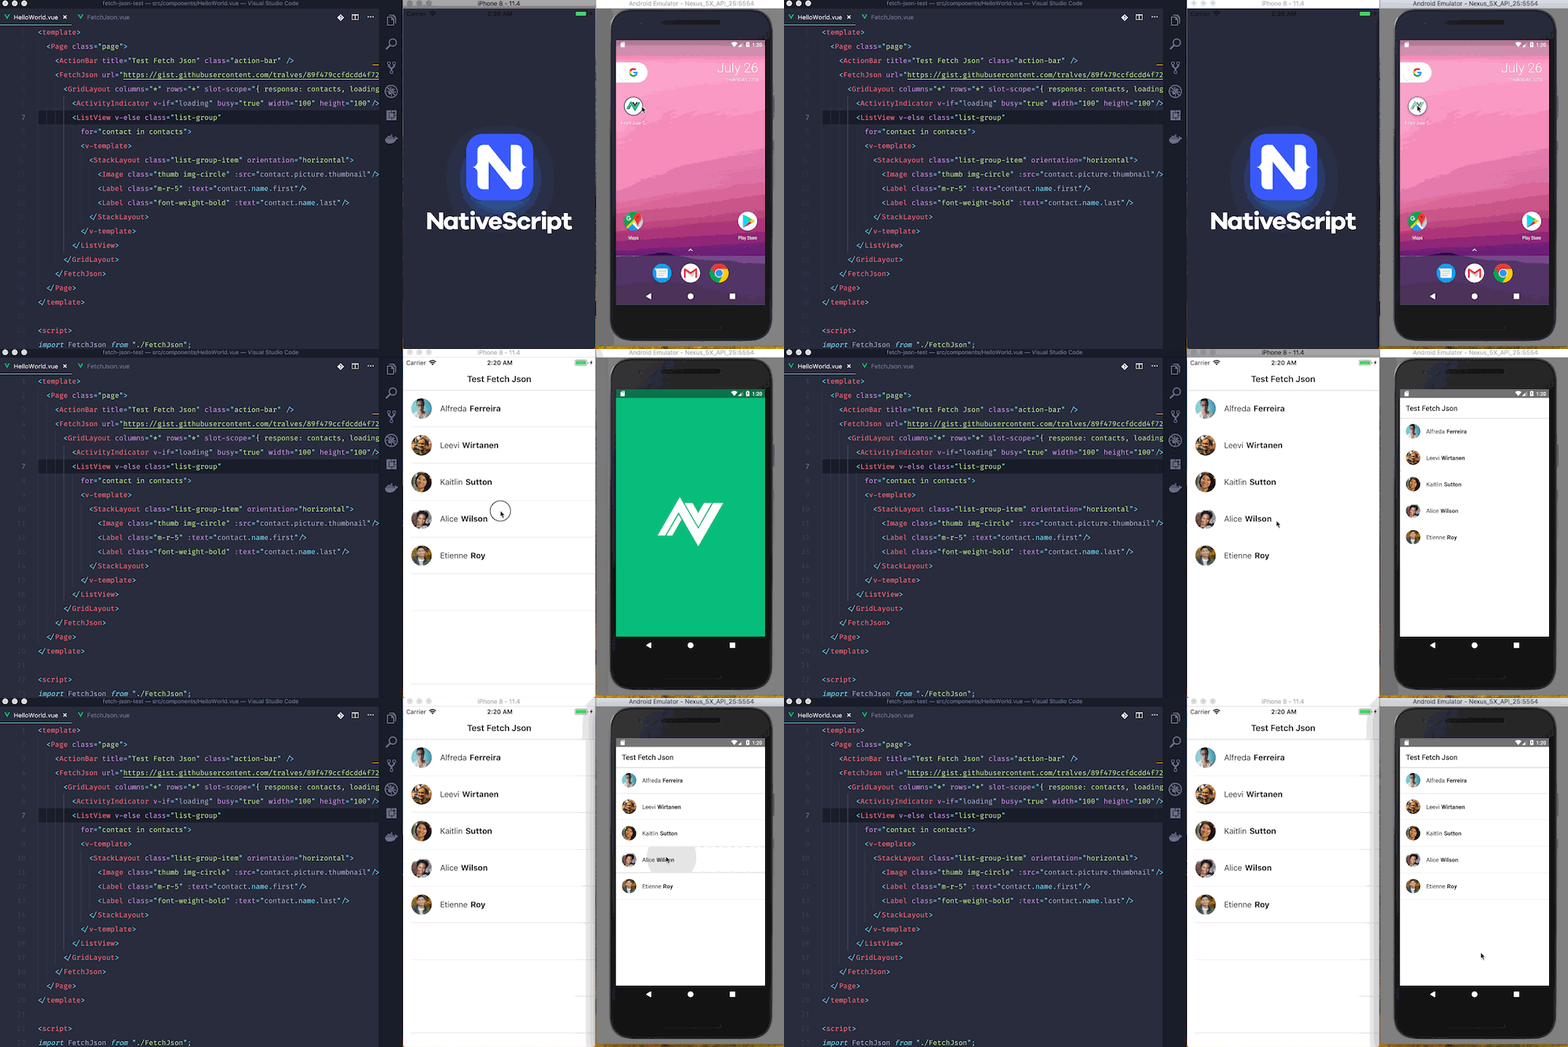
The <FetchJson> component, created by Adam Wathan, fetches a JSON from a URL and sends the response to its children. It also provides a variable loading to inform the status of the request. Let's see how it looks like to use this component.
<FetchJson url="https://gist.githubusercontent.com/tralves/89f479ccfdcdd4f720c193e0cd369115/raw/eb17277aa420c70df5130dbd0c27091cec6db4fe/contacts.json">
  <GridLayout columns="*" rows="*" slot-scope="{ response: contacts, loading }">
    <ActivityIndicator v-if="loading" busy="true" width="100" height="100"/>
    <ListView v-else class="list-group"
      for="contact in contacts">
      <v-template>
        <StackLayout class="list-group-item" orientation="horizontal">
          <Image class="thumb img-circle" :src="contact.picture.thumbnail"/>
          <Label class="m-r-5" :text="contact.name.first"/>
          <Label class="font-weight-bold" :text="contact.name.last"/>
        </StackLayout>
      </v-template>
    </ListView>
  </GridLayout>
</FetchJson>
In this example, we used loading to show/hide the <ActivityIndicator>, and sent the response (destructured as contacts) to the <ListView>.
Look at that! We made an HTTP request, retrieved the results, and checked the status of the request with no JavaScript! Our code only has to worry about how the information will be presented to the user once the request arrives. You can also make successive requests just by updating the url component variable.
In a large app, you will probably want to use NativeScript's http module or Axios. More than showing a way to make a request, this small example proves a point.
Let's push this Renderless Component thing further and see where it takes us...
Tweezing native components!
See the full demo on Playground.
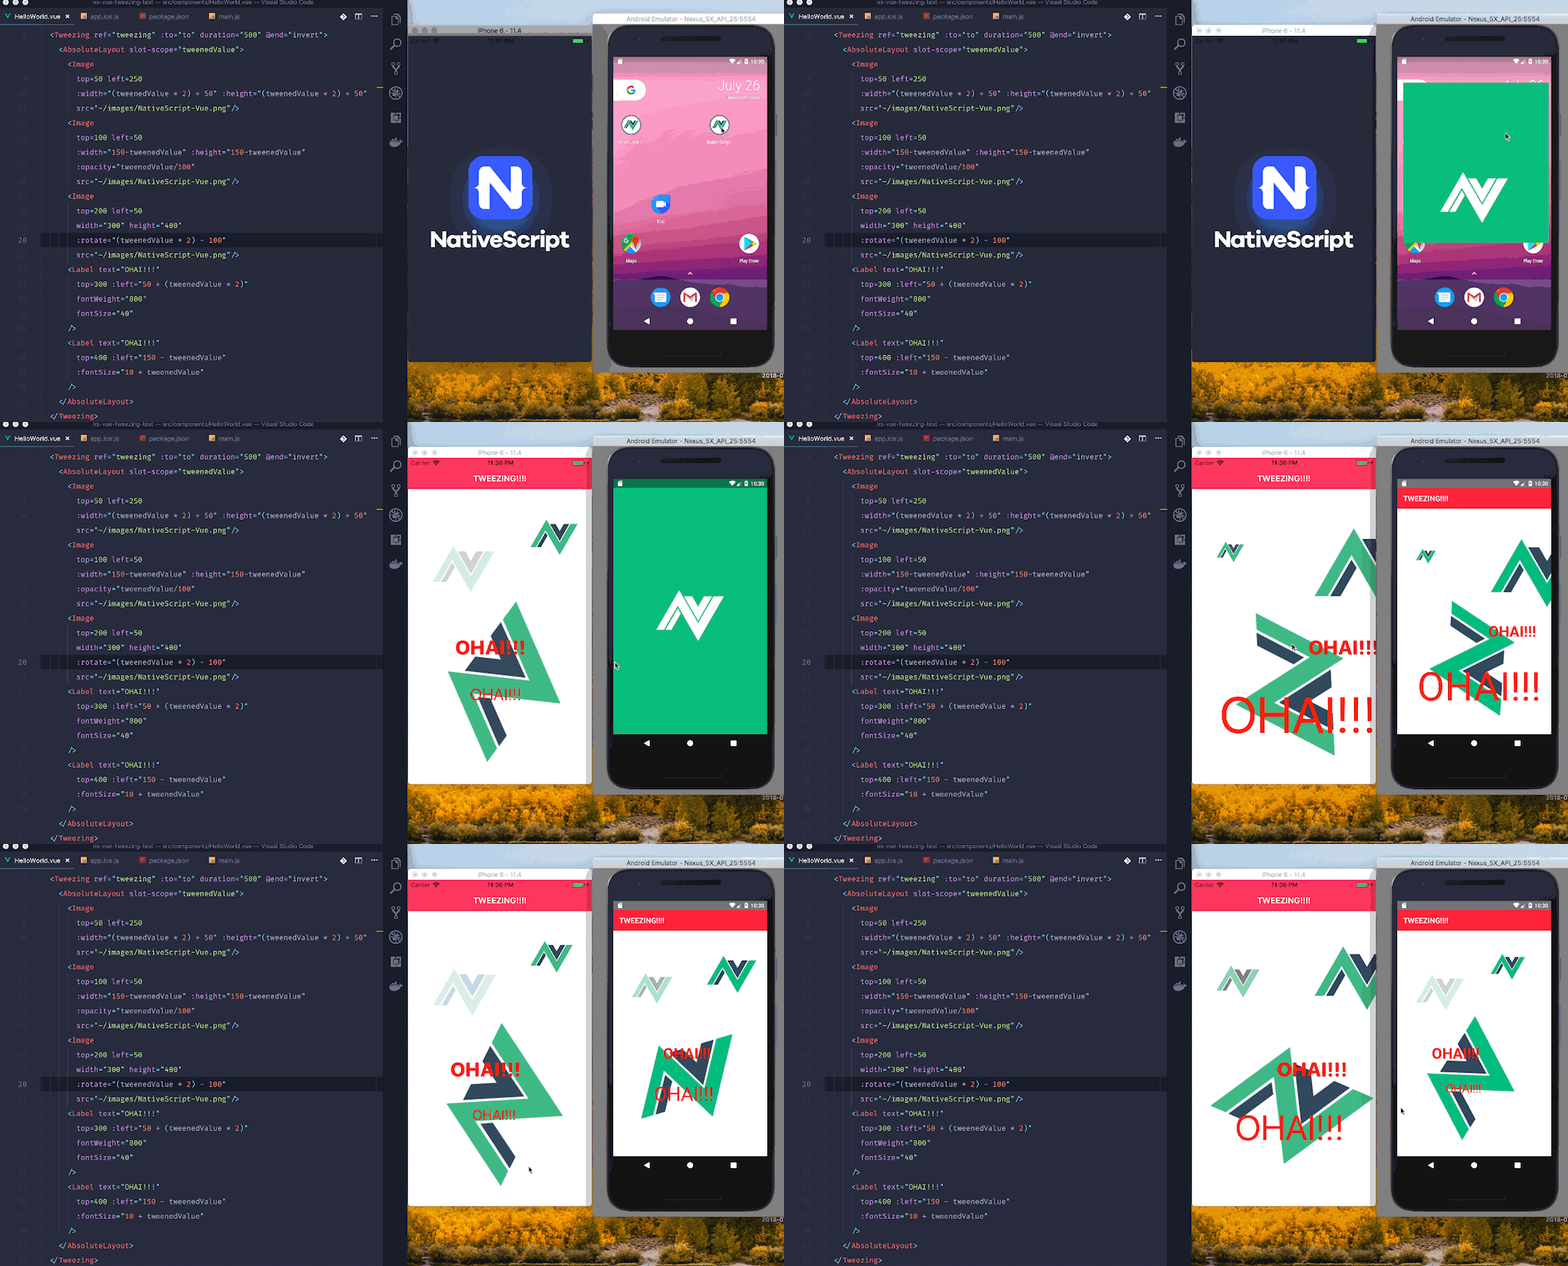
Eduardo San Martin Morote wrote the Renderless Component vue-tweezing. This component tweens a variable and passes it to its children. Tweening means transiting variable from a value to another, smoothly during a period of time, which then can be used to produce animations. Using vue-tweezing with NativeScript-Vue looks like this:
<Tweezing ref="tweezing" to="100" duration="500">
  <AbsoluteLayout slot-scope="tweenedValue">
    <Image top=50 left=250
      :width="tweenedValue + 50"
      :height="tweenedValue + 50"
      src="~/images/NativeScript-Vue.png"/>
  </AbsoluteLayout>
</Tweezing>
In this snippet, we are using the tweened value to change the width and height of an image, which results in an animation growing the image. As you could see in the video bellow, we can animate all sorts of properties such as opacity, font-size, left/top, etc.

This method of animation will probably not beat the performance of NativeScript animations, even though it felt really smooth in our tests on a real device. On the other hand, it looks easy to understand and implement!
The <Tweezing> component looks a lot crazier than the <FetchJson> example but, in reality, they both do the same thing: pass some data to their children.
What about Renderless Components that, instead of than just passing a variable, encapsulate some complex behavior? We can go deeper...

Creating a Renderless Tag Input
See the full demo on Playground.
Adam Wathan also created the component <renderless-tag-input>. This is a Renderless Component to create lists of tags. It may seem that the logic behind managing a list of tags is not very complex, but this component implements things that are easy to forget such as sanitizing tag strings, filtering out repeated tags, clear the text field when the tag is created, etc.
See how we used this component with NativeScript-Vue:

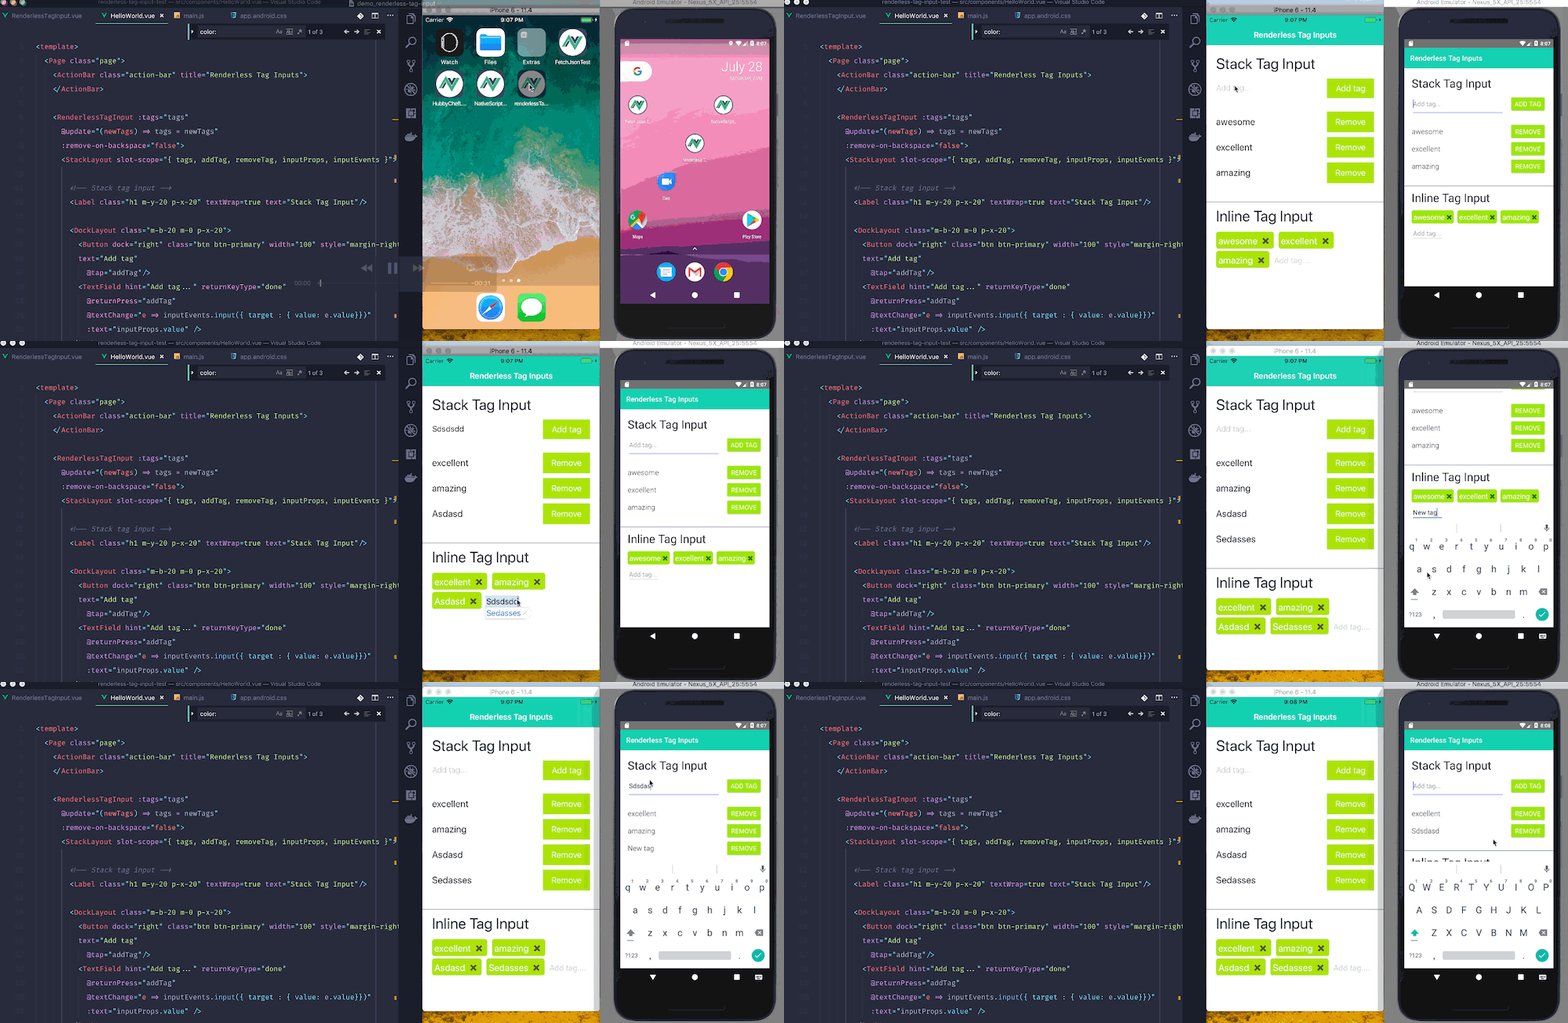
The video shows that we used the component to implement two completely different UIs. Let's see the first implementation, the Stack Tag Input:
<RenderlessTagInput :tags="tags"
  @update="(newTags) => tags = newTags"
  :remove-on-backspace="false">
  <StackLayout slot-scope="{ tags, addTag, removeTag, inputProps, inputEvents }">

    <DockLayout class="m-b-20 m-0 p-x-20">
      <Button dock="right" class="btn btn-primary" width="100" style="margin-right:0;"
        text="Add tag"
        @tap="addTag"/>
      <TextField hint="Add tag..." returnKeyType="done"
        @returnPress="addTag"
        @textChange="e => inputEvents.input({ target : { value: e.value}})"
        :text="inputProps.value" />
    </DockLayout>

    <DockLayout class="p-0 p-x-20 m-b-10" v-for="tag in tags" :key="tag" >
      <Button dock="right" class="btn btn-primary btn-rounded-sm" width="100" style="margin: 0;"
      text="Remove"
      @tap="removeTag(tag)"/>
      <Label :text="tag" class="t-20 p-y-10"/>
    </DockLayout>
  </StackLayout>
</RenderlessTagInput>
There is a lot going on here. The <RenderlessTagInput> receives the prop tags for the tag list, and emits an event update whenever the tag list changes. This way, our local variable tags is always in sync with what happens inside the component. The <RenderlessTagInput> receives the <StackLayout> as slot, which in turn receives a scope with the variables:
tags: the current list of tags. We use it to render the list of tags;addTag: callback function to add a tag. We call it when the user presses the "Add tag" button or when he confirms directly from the virtual keyboard.removeTag: callback function to remove a tag;-
inputProps: props to be passed to the input field. This allows the<RenderlessTagInput>to clear the text field when the tag is created;inputEvents: events to be passed from the input field to the<RenderlessTagInput>. We are calling theinputevent when the text in the text field changes.
Since <RenderlessTagInput> is a Renderless Component, we can use the very same scoped variables to implement a completely different UI. See how we did it for the Inline Tag Input:
<RenderlessTagInput :tags="tags"
  @update="(newTags) => tags = newTags">
  <StackLayout slot-scope="{ tags, addTag, removeTag, inputProps, inputEvents }">

    <WrapLayout class="p-x-20">
      <StackLayout orientation="horizontal" class="btn btn-primary"
          style="margin: 0 10 5 0; padding: 5 5 2 5; border-radius:5"
          v-for="tag in tags" :key="tag">
        <Label :text="tag" class="t-20 p-r-5"/>
        <Label style="margin: 0; color: #386422" text="✖" @tap="removeTag(tag)"/>
      </StackLayout>
      <TextField hint="Add tag...." returnKeyType="done"
        @returnPress="addTag"
        @textChange="e => inputEvents.input({ target : { value: e.value}})"
        :text="inputProps.value" />
    </WrapLayout>

  </StackLayout>
</RenderlessTagInput>
Could you spot the slot scope variables in this sample? Good!
In conclusion...
... Renderless Components are awesome! The thing that gets me most excited about these examples is that Adam and Eduardo built components for the web. Using them with native components probably didn't even cross their mind!
The Vue.js ecosystem is just starting to embrace the concept. In this post, we used three components built by Adam and Eduardo, but I have a feeling many more will appear. For instance, check out Banshee, a UI library that only provides Renderless Components.
Of course, some components are specifically built for the web and we will not be able to use them with NativeScript-Vue... but not all of them! Let's just enjoy the fact that our toolbox just grew bigger with the addition of Renderless Components. Next time, while implementing some UI behavior in your NativeScript-Vue app, check if someone already did that as a Renderless Component.