Protecting Your Source Code with Jscrambler
Today we’re happy to announce support for Jscrambler in NativeScript apps. Jscrambler is premium tool that transforms the JavaScript in your application to make it extremely difficult to reverse engineer. Let’s look at how it works.
Watch the webinar "Best Practices for Securing Your Mobile Apps" to get some tips and tricks on NativeScript security!
Today we’re happy to announce support for Jscrambler in NativeScript apps. Jscrambler is a premium security tool that transforms the JavaScript in your application to make it extremely difficult to reverse engineer.

In this article we’ll look at why you might want to use Jscrambler, how it works, and how you can integrate the tool into your own NativeScript apps. Let’s start by looking at why Jscrambler might be a good fit for your applications.
Why Jscrambler?
In NativeScript, you write your application logic in JavaScript. And because JavaScript is not a compiled language, your NativeScript application’s source code gets distributed in plain text as part of your Android and iOS application packages. If you dig into the platforms folder, you’ll find the plain text source code that ships with your NativeScript apps—code that malicious users have the potential to find as well.
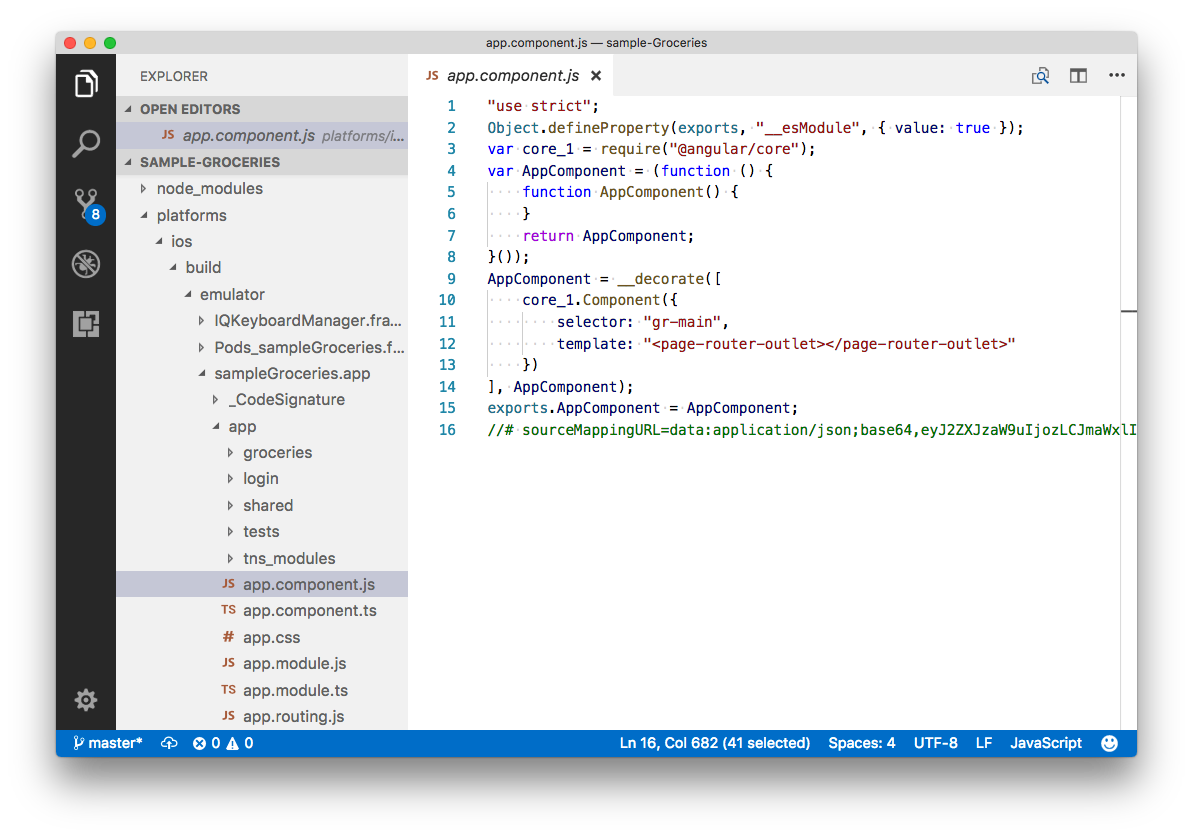
An example of the plain text code that gets distributed with your NativeScript applications by default. This specific code is from a built version of the NativeScript Groceries sample.
If you come from a web development background, this plain text deployment is not a new concept—web apps absolutely must ship their source code in plain text for browsers to interpret it. But if you come from a native development background this is a new problem, as native apps typically only distribute compiled byte code.
If you’re concerned about protecting your NativeScript app’s source code, you have a few options. NativeScript has built-in support for UglifyJS, a tool that compresses JavaScript code. During the minification process, Uglify replaces variable names and removes whitespace, making your code far harder for your average developer to read. For example, here’s what the code for the Groceries sample looks like after it goes through UglifyJS.
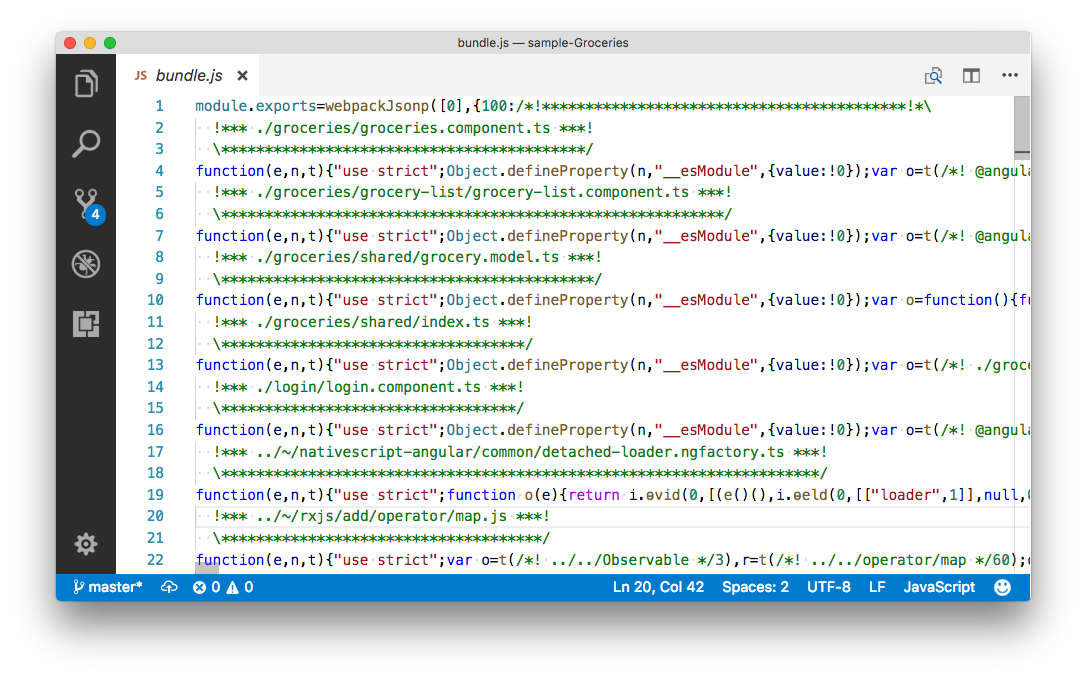
The source code of the NativeScript Groceries sample after going through UglifyJS.
However, UglifyJS’s sole purpose is to reduce the file size of your code, and not to obfuscate your code so that’s it’s difficult for malicious users to reverse engineer. For instance, if I take the same minified code from above and run it through an online formatting tool, suddenly that code becomes far more readable.
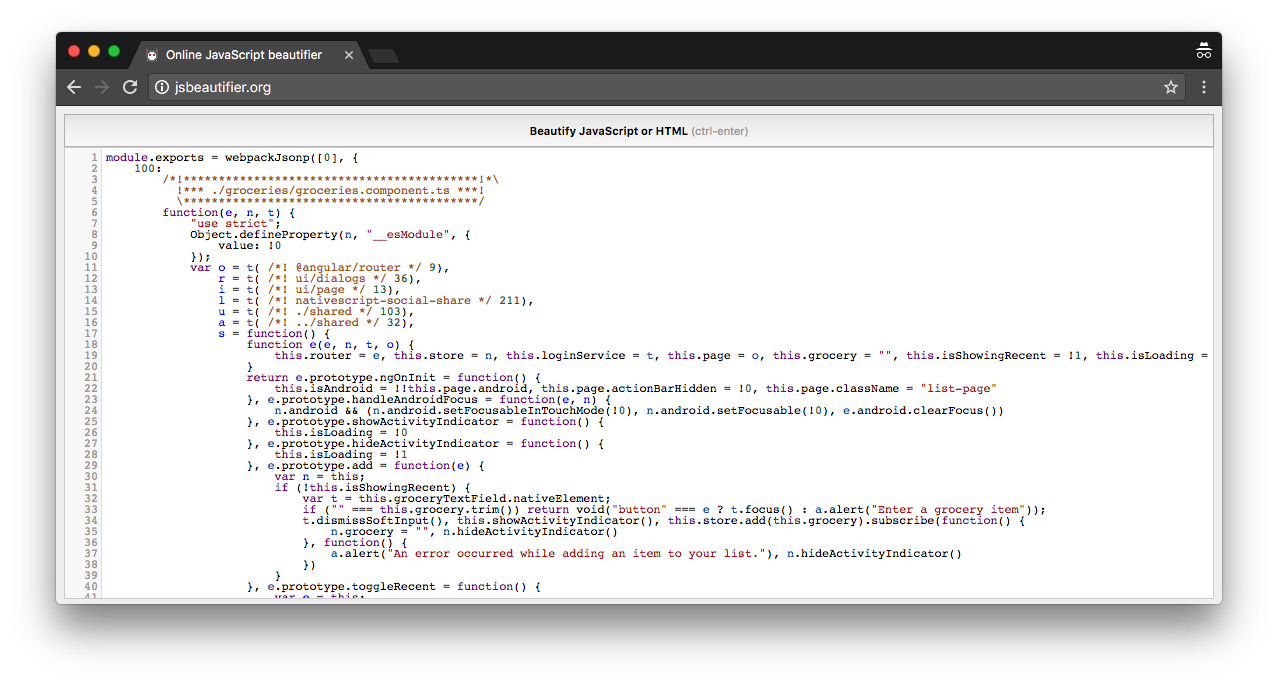
The uglified source code of the NativeScript Groceries sample formatted using beautifier.io.
The UglifyJS minification might be sufficient if you just want to do some really basic code hiding as part of your NativeScript app deployments, but if you really want to protect your code you need a tool dedicated to JavaScript protection—and that’s where Jscrambler comes in.
How Jscrambler works
At a high-level, Jscrambler takes your JavaScript code and mangles it beyond recognition while adding a series of protective layers. These include Polymorphic Obfuscation, Code Locks, and Self-Defending capabilities. With these layers, Jscrambler goes way beyond obfuscation and the resulting source code can prevent debugging and tampering attempts while continuing to work as expected.
Just to give you an idea of what that looks like, here’s what the same NativeScript Groceries sample code looks like after it goes through Jscrambler.
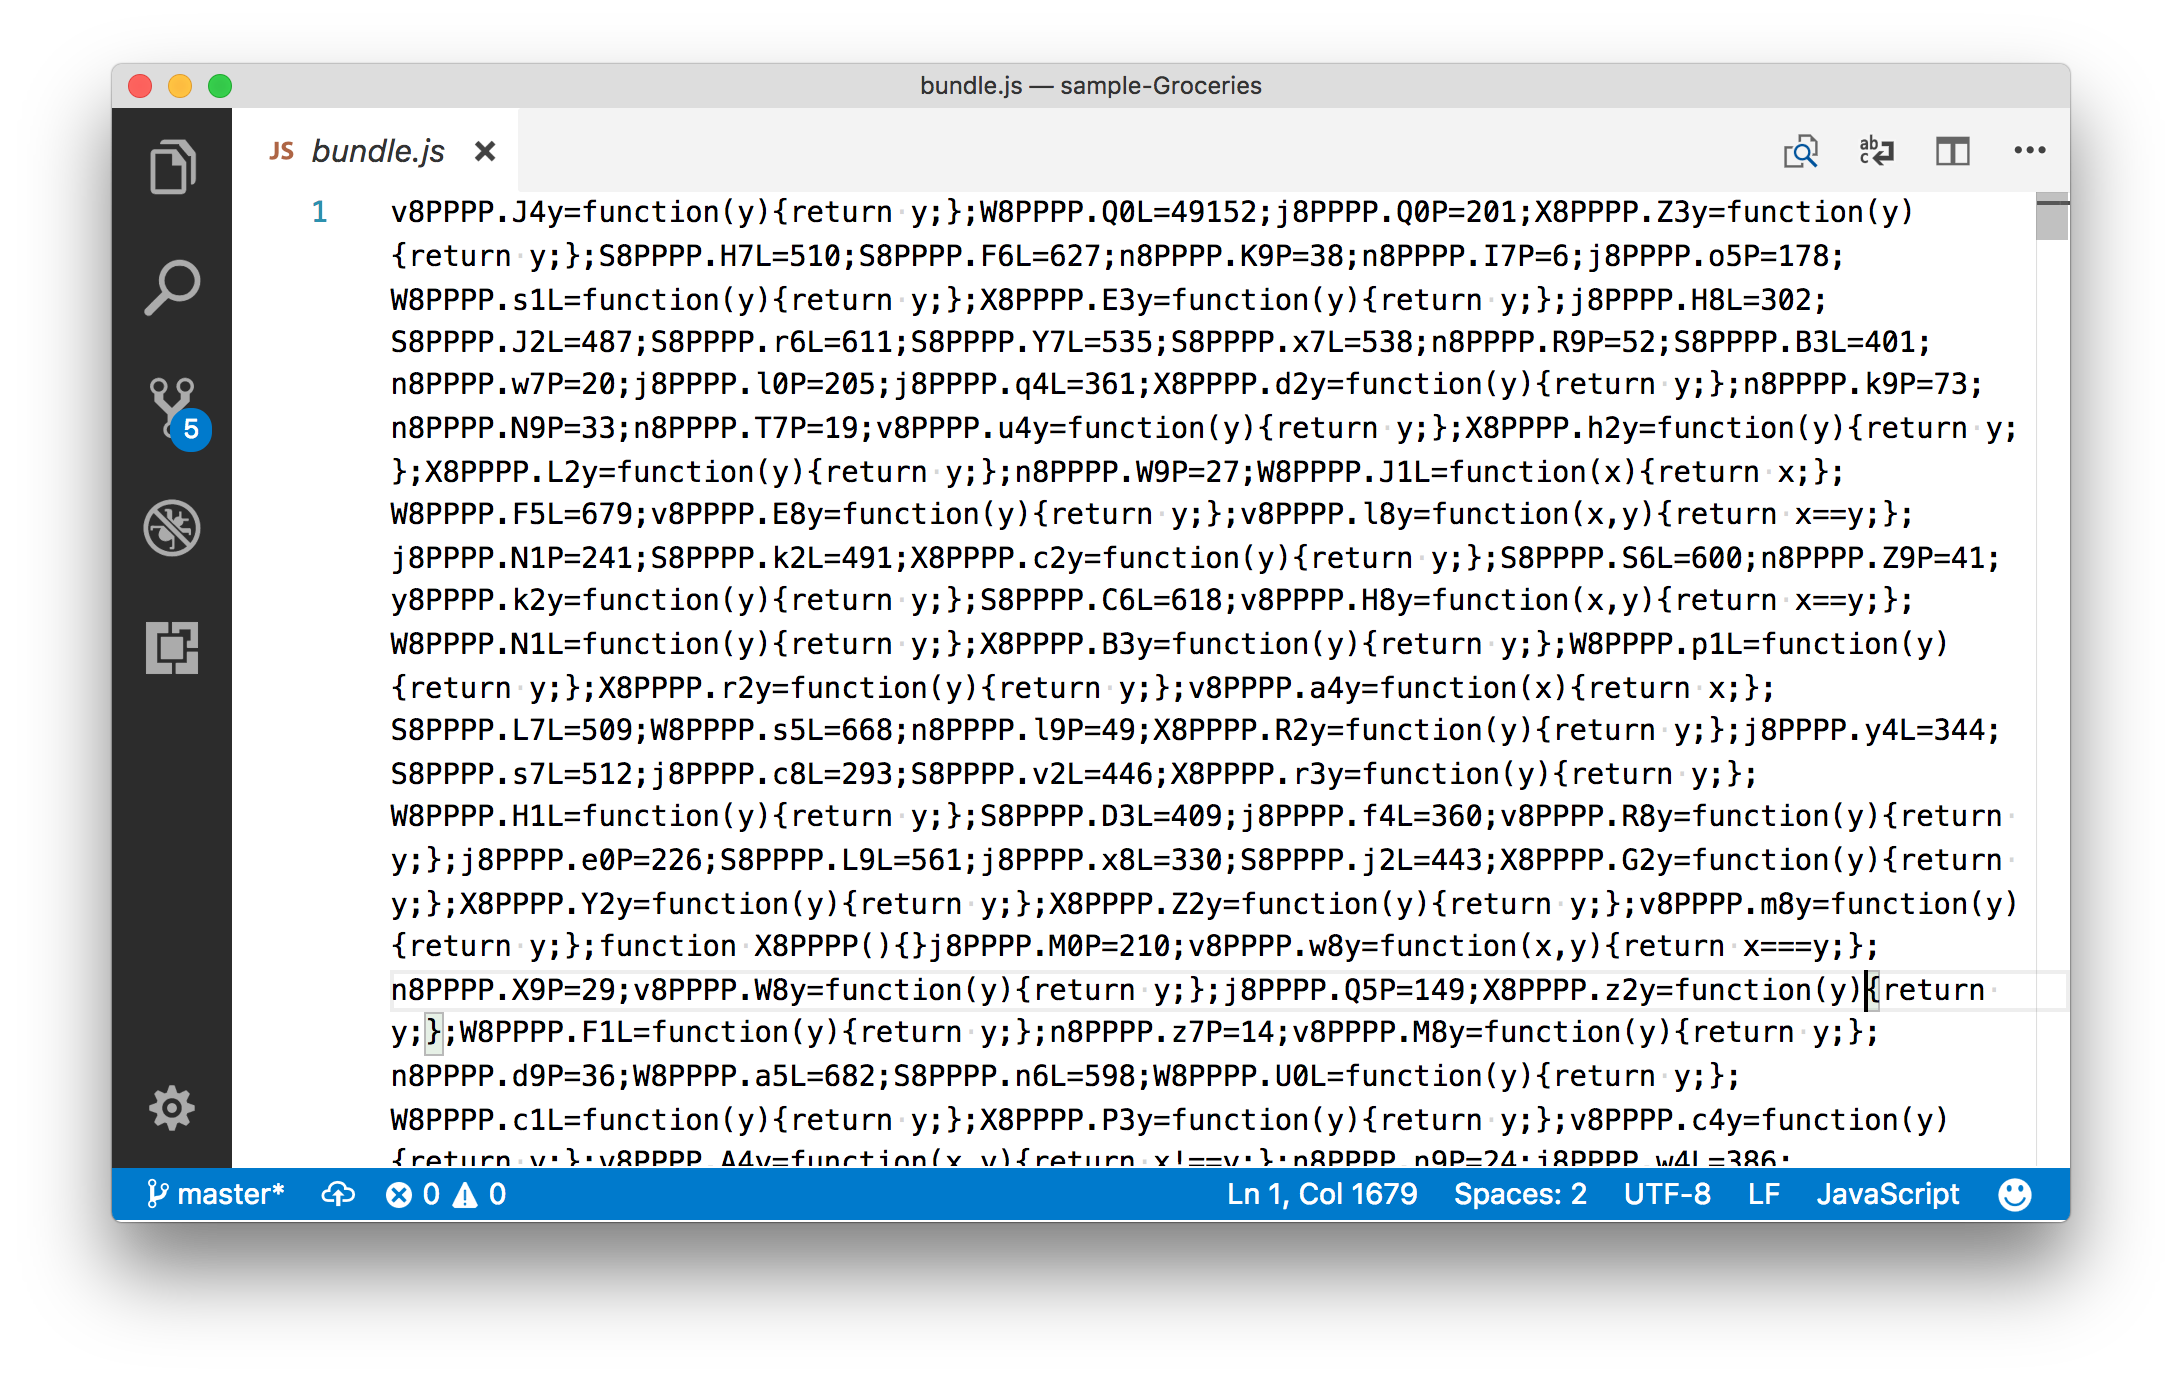
The source code of the NativeScript Groceries sample after going through Jscrambler.
Good luck figuring out what’s going on there. And even if you run this code through a beautifier or formatting tool, you’ll still have a heck of a time deciphering anything. Here’s what that same file looks like after going through beautifier.io.
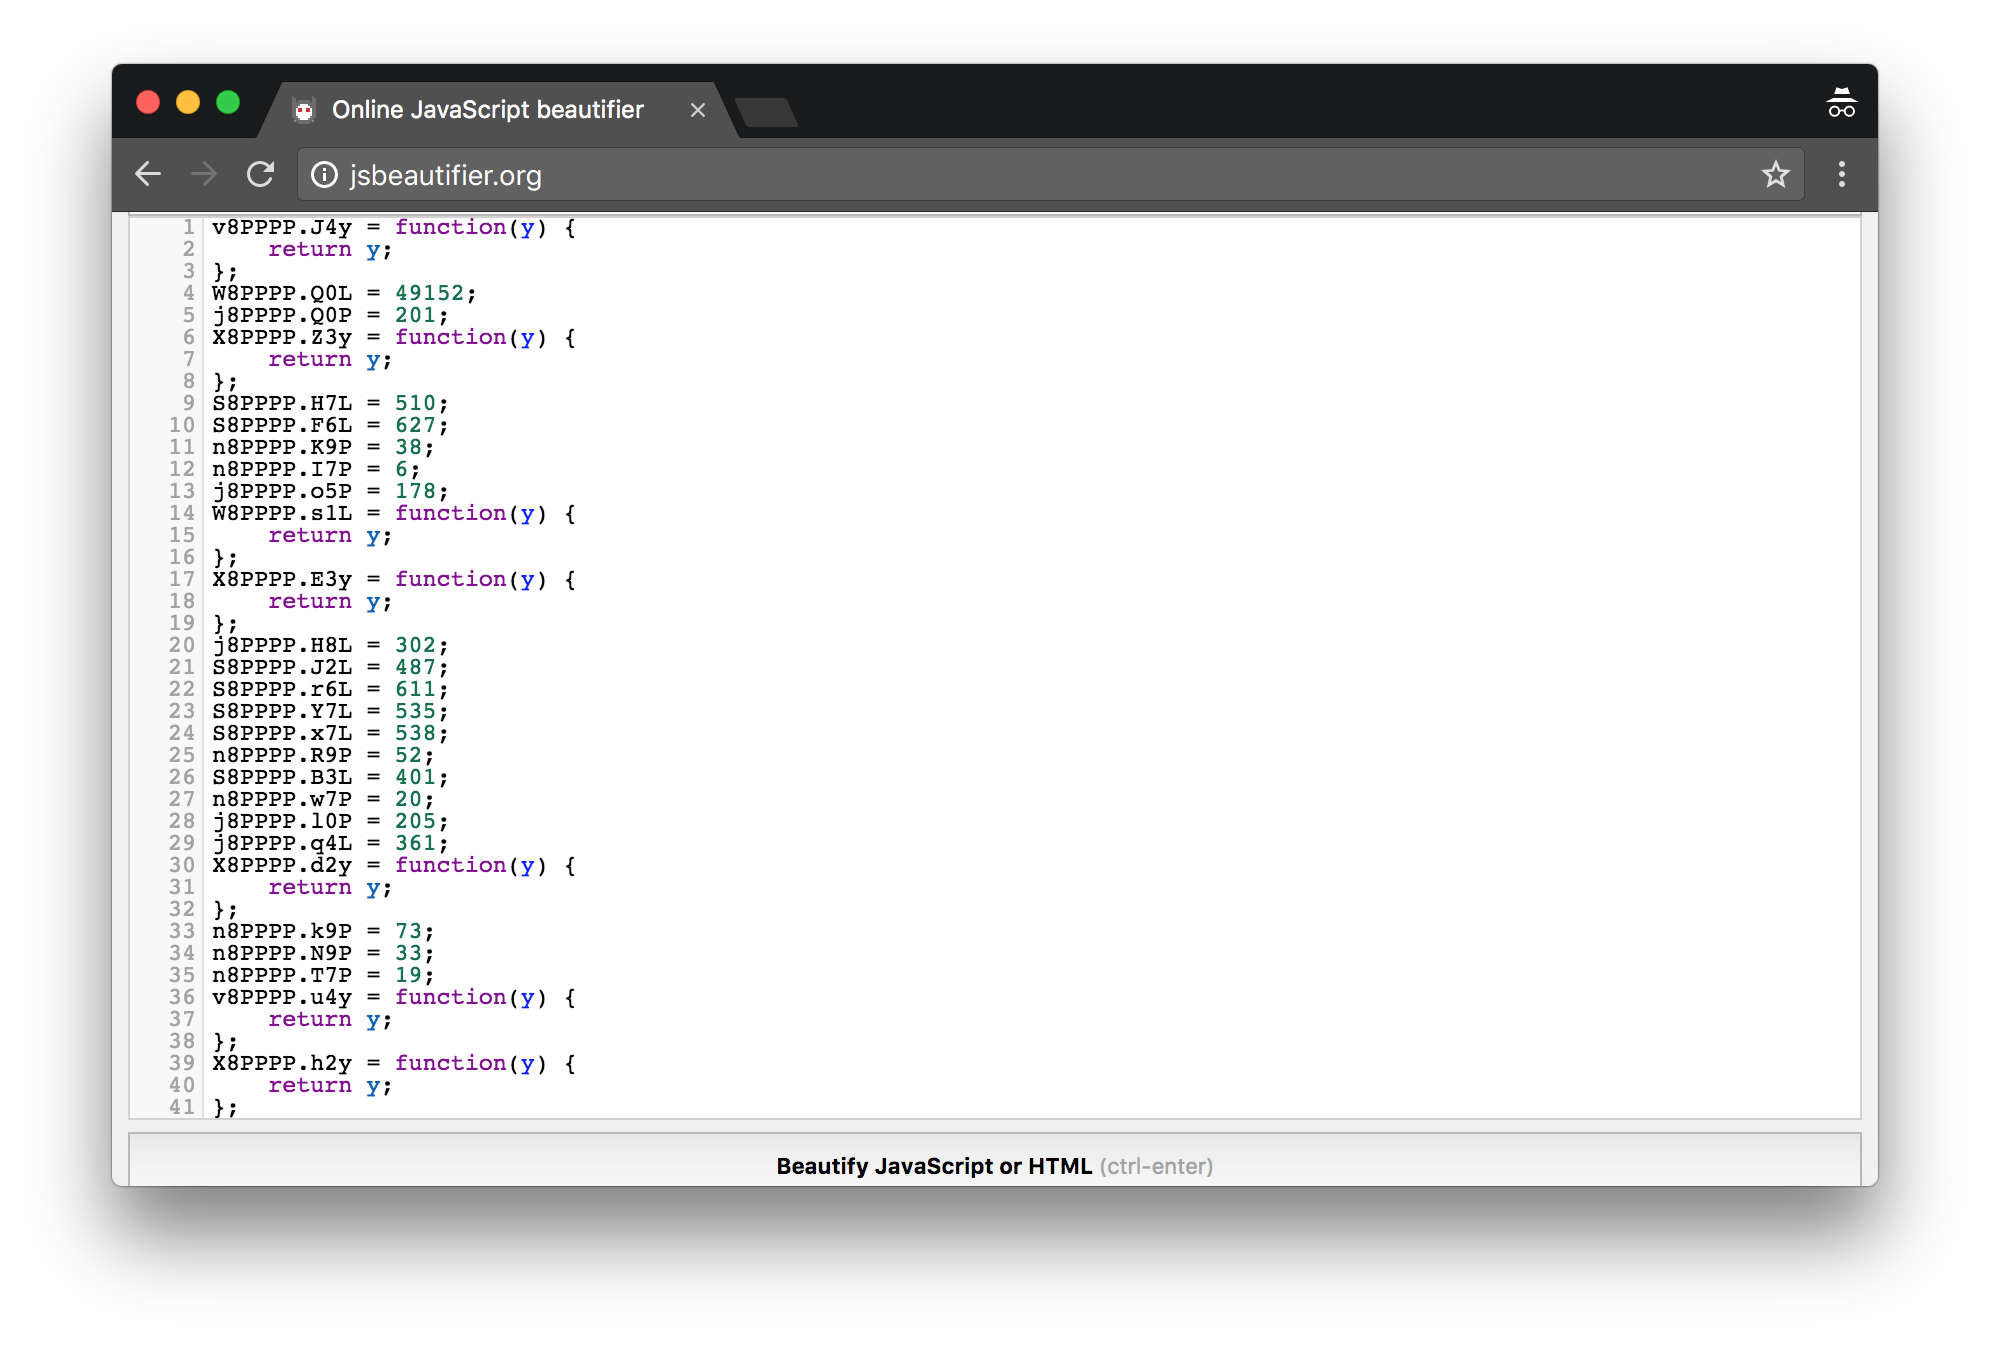 The Jscrambler-processed source code of the NativeScript Groceries sample formatted using beautifier.io.
As the above screenshot above shows, Jscrambler goes above and beyond scrambling your code so that it’s unreadable even after going through formatting and beautifier tools. Malicious users will have a heck of a time trying to understand what that code is doing, especially because Jscrambler has a built-in feature that prevents any reverse engineering tool from working against it.
Jscrambler offers a number of configurable transformations so you can fine tune exactly how the tool transforms your code, but the Jscrambler team has provided us with a series of default settings for NativeScript developers. Let’s take a look at these settings and see how you can get Jscrambler working in your apps.
Getting Jscrambler working
The first thing to note is Jscrambler is a premium tool, however, they do offer free trials for anyone that wants to give Jscrambler a shot. To follow the steps in this article you’ll need to sign up for one of those trials on the Jscrambler signup page as shown below.

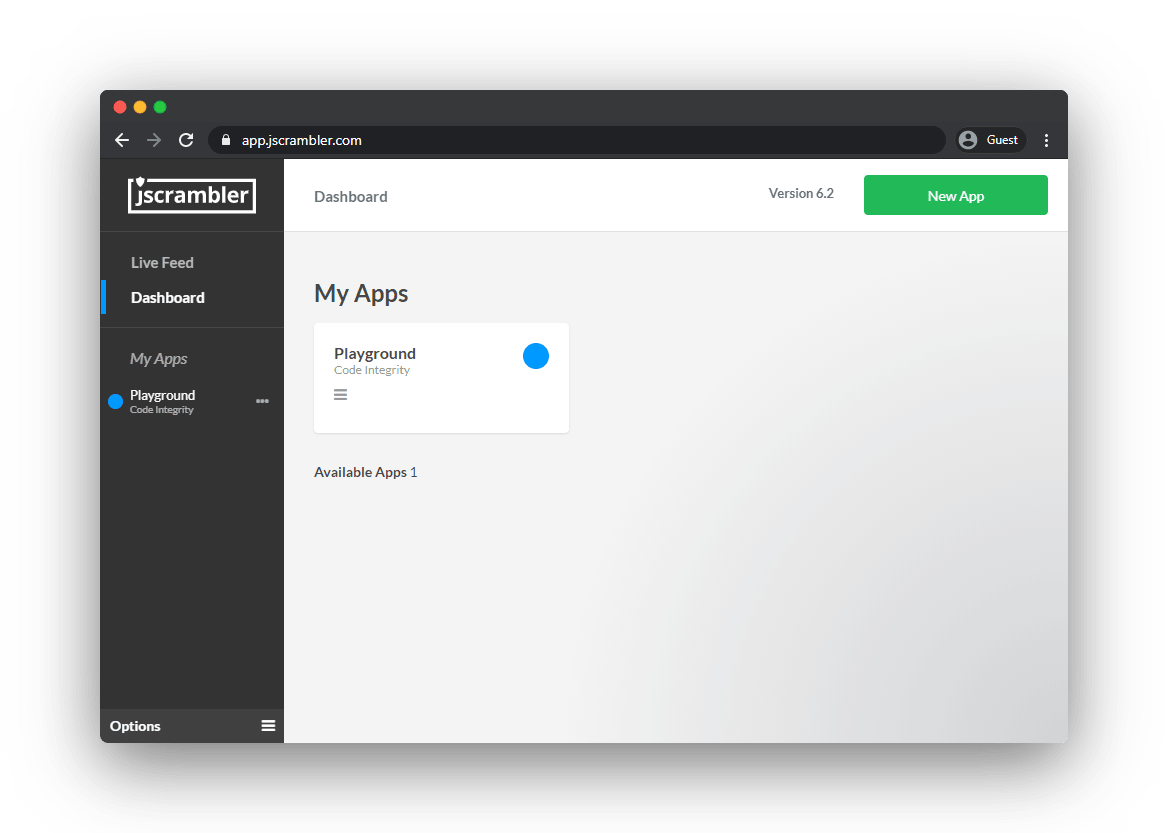
After you create your trial account and finish the Jscrambler onboarding demo, head to your Dashboard and click the big green “New App” button at the top right.
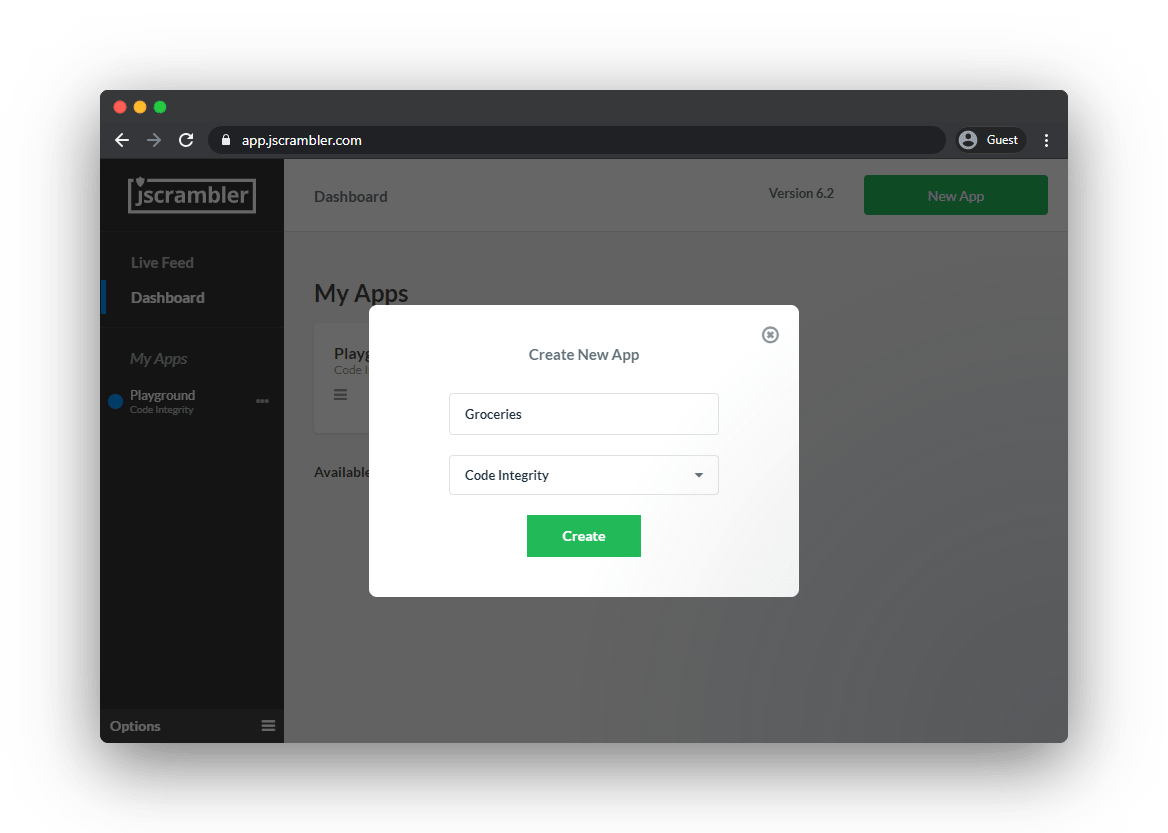
Give the app a name, select “Code Integrity” on the “Protection Type” dropdown, and click the green “Create” button.
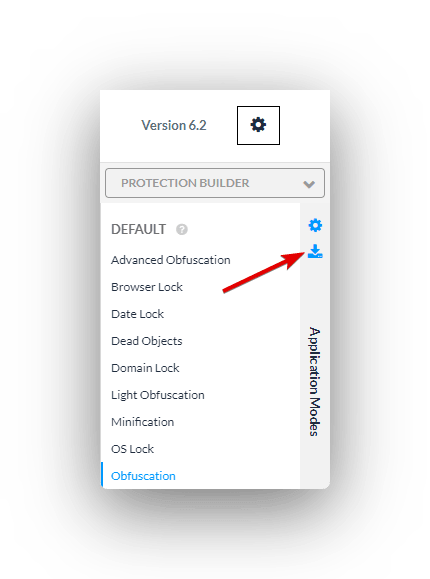
Now, you’ll want to select the Jscrambler transformations you wish to apply to your source code. There are a lot of them so, to get started, let’s select one of Jscrambler’s protection templates. Go to the “Templates” tab and select “Obfuscation”.
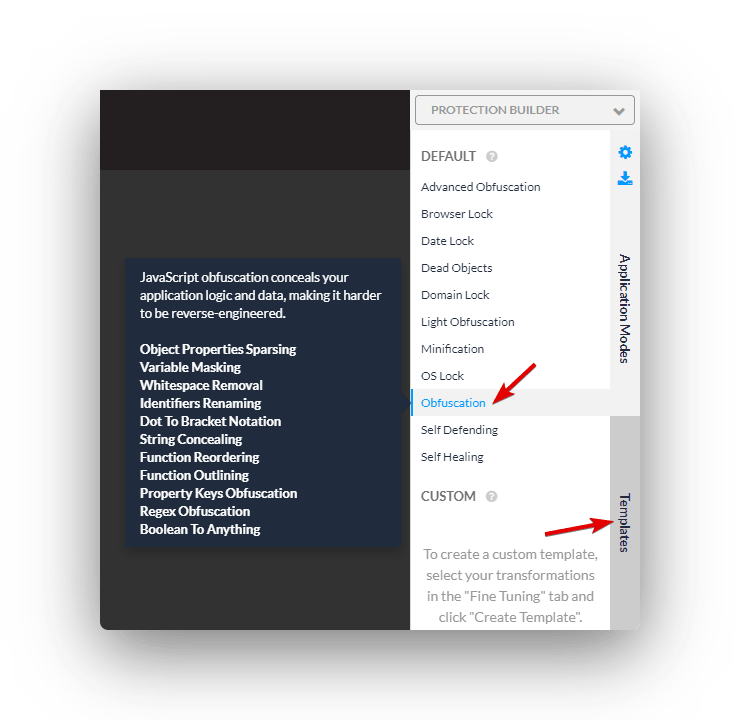
At this stage, we can make our lives a lot easier by grabbing a JSON file with all of Jscrambler’s configuration. To do that, click the blue download icon on the top right:
Now that you have the necessary Jscrambler account work done, let’s shift over to your NativeScript app to see how to tie into the Jscrambler service.
Installing the Jscrambler plugin
Jscrambler’s NativeScript integration is done through a webpack plugin. So if you haven’t already, go ahead and install the NativeScript webpack plugin in your app. If all goes well, the installation should be as easy as running the following two commands.
npm install --save-dev nativescript-dev-webpack
And then:
npm install
NOTE: If you run into issues setting up webpack in your NativeScript app, the NativeScript community forum is a great place to ask for help.
Once you have webpack installed, you’ll next want to install the Jscrambler webpack plugin.
npm i --save-dev jscrambler-webpack-plugin
After that, copy the jscrambler.json file that you downloaded before and paste it into the root of your app. The file should look like this:
{
  "keys": {
    "accessKey": "YOUR ACCESS KEY HERE",
    "secretKey": "YOUR SECRET KEY HERE"
  },
  "applicationId": "YOUR APPLICATION ID HERE",
  "params": [
    {
      "name": "objectPropertiesSparsing"
    },
    {
      "name": "variableMasking"
    },
    {
      "name": "whitespaceRemoval"
    },
    {
      "name": "identifiersRenaming",
      "options": {
        "mode": "SAFEST"
      }
    },
    {
      "name": "dotToBracketNotation"
    },
    {
      "name": "stringConcealing"
    },
    {
      "name": "functionReordering"
    },
    {
      "options": {
        "freq": 1,
        "features": [
          "opaqueFunctions"
        ]
      },
      "name": "functionOutlining"
    },
    {
      "name": "propertyKeysObfuscation",
      "options": {
        "encoding": [
          "hexadecimal"
        ]
      }
    },
    {
      "name": "regexObfuscation"
    },
    {
      "name": "booleanToAnything"
    }
  ],
  "areSubscribersOrdered": false,
  "applicationTypes": {
    "webBrowserApp": false,
    "desktopApp": false,
    "serverApp": false,
    "hybridMobileApp": false,
    "javascriptNativeApp": false,
    "html5GameApp": false
  },
  "useRecommendedOrder": true,
  "jscramblerVersion": "<VERSION>",
  "tolerateMinification": true,
  "useProfilingData": false
}
NOTE: This file contains an example of recommended settings for using Jscrambler in NativeScript apps. Feel free to check out the Jscrambler docs for more details on what each of these settings do.
The placeholder values you see above—YOUR ACCESS KEY HERE, YOUR SECRET KEY HERE, YOUR APPLICATION ID HERE, and VERSION—will already be filled out if you downloaded the JSON file from the Jscrambler Web App. If you wish to retrieve them manually, check this Jscrambler guide.
With your configuration in place, your last step is to add Jscrambler’s webpack plugin in your webpack configuration. To do that, open your webpack.config.js file in the root of your app.
In this file, start by copying and pasting these two lines of code at the top, which imports the plugin itself and makes it available to use.
const JscramblerWebpack = require("jscrambler-webpack-plugin");
const jscramblerConfig = require("./jscrambler.json");
Next, scroll down in the same webpack.config.js file until you find the Plugins array. To activate the Jscrambler plugin, you need to add the following entry to that array.
new JscramblerWebpack(Object.assign({}, jscramblerConfig, {
    chunks: ["bundle"]
})),
And with that, you should be all set to test Jscramber in your app.
Protecting your code
To run your app through Jscrambler, all you have to do is run one of the npm scripts that build NativeScript apps with webpack enabled. The easiest to use are the ones shown below, which build your app with webpack and start them on either an iOS or Android device.
tns build ios --bundle
or
tns build android --bundle
After the build process completes, you’ll have to look through the platforms folder to see the result of the protection, specifically on platforms/<android|ios>/app/build/outputs/apk/debug. Open those folders’ bundle.js file and you should find heavily obfuscated code that looks something like this.
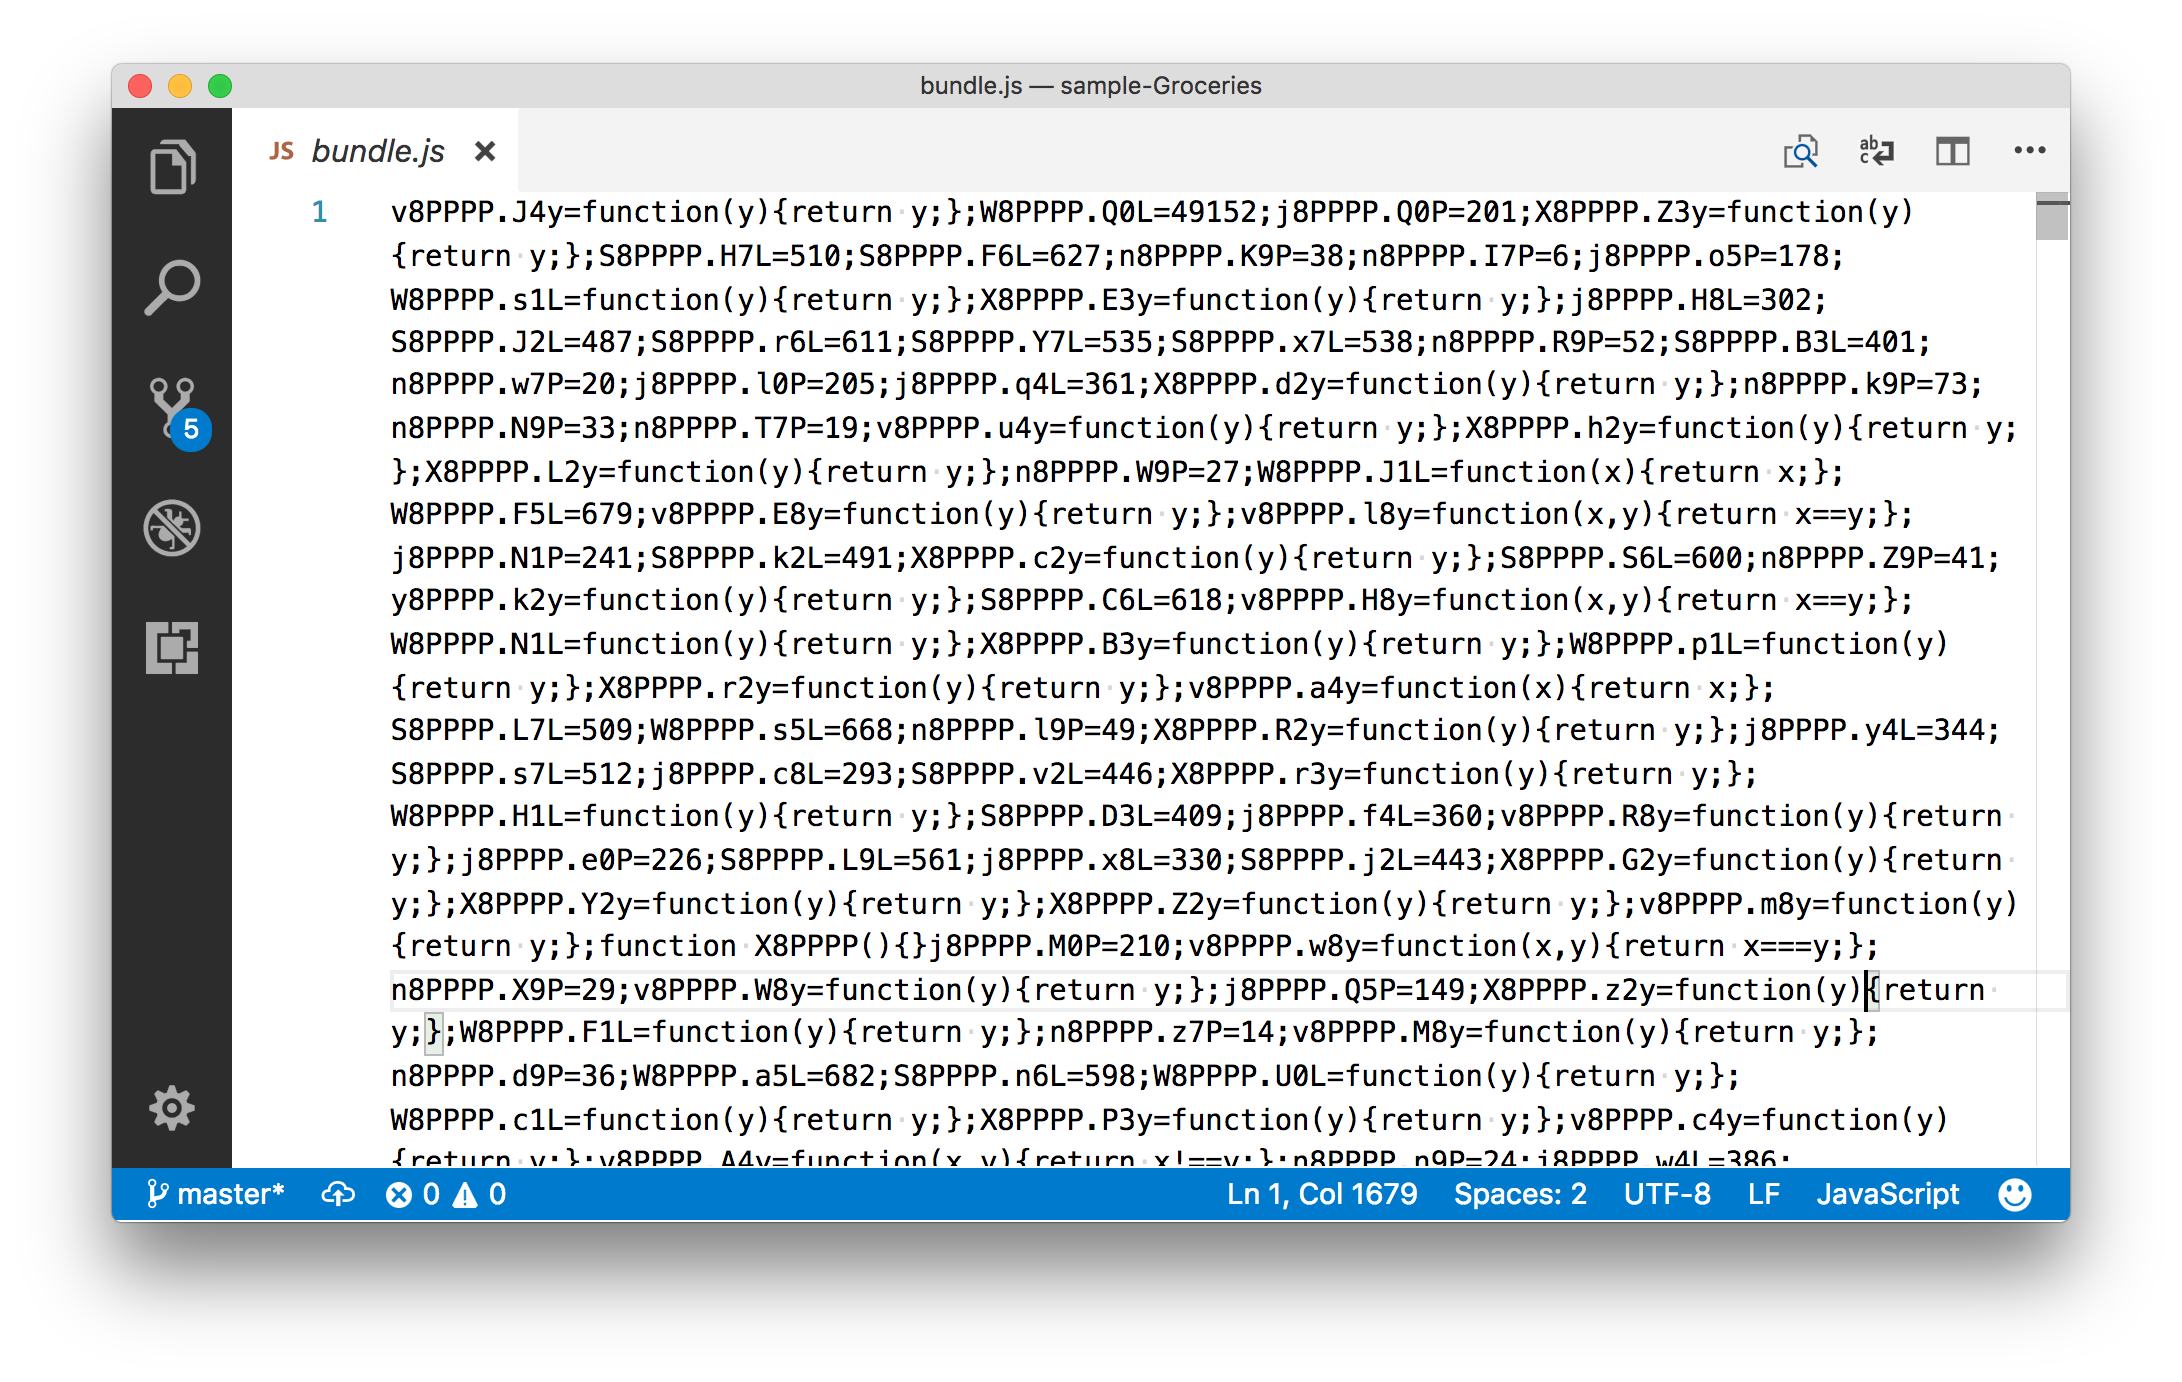
Malicious users will now have an extremely difficult time figuring out what this code does, and your app should continue to work exactly as expected.
Furthermore, in our testing, we haven’t detected any meaningful performance regressions from protecting NativeScript application code with Jscrambler. Your experiences may vary, so keep an eye out for Jscrambler’s performance-focused features such as Profiling and Code Annotations.
Also bear in mind that, in this tutorial, we only selected the Obfuscation template. If you’re interested in increased protection, namely anti-debugging and anti-tampering features, try out other templates such as Self-Defending.
Wrapping up
Jscrambler is a powerful tool for protecting your JavaScript code from malicious users. The Jscrambler webpack plugin fits nicely into NativeScript webpack workflow, making it a convenient option for NativeScript developers looking to protect their source code.
So try going through this article’s steps in your own apps and see how it goes. We recommend you give Jscrambler a shot and let us know what you think!