NativeScript Now Supports Vector Types
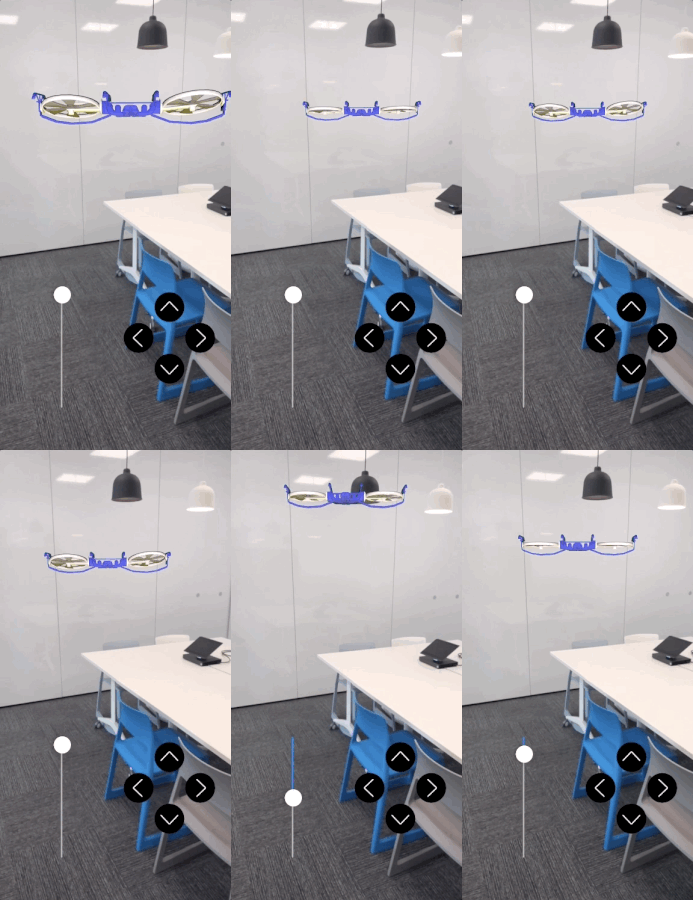
Up until NativeScript 4.1.0 creating AR (augmented reality) apps was possible but somewhat limited due to the unsupported iOS vector types. I won’t get into details about AR and how you can use NativeScript for creating augmented reality apps (there are already some great articles on this topic - https://www.nativescript.org/blog/getting-started-with-augmented-reality-in-nativescript) but rather show you how to use vector type values provided by ARKit.
Vectors, Matrices, SIMD Types and Vectorization
Matrices are a fundamental part of AR and anything related to computer graphics, as they are a great way to represent image information. While a vector can be defined as a list of numbers, an n-matrix is a collection of numbers, organised in rows and columns. Each column is represented by a vector so that Nx1 matrix is same as vector with N elements.
For example, if we have two vectors a = (6, 4, 24) and b = (1, -9, 8) we can put them in the columns of a matrix:

The rows and columns determine a matrix’s dimension - the one we just drew is a 2x3 matrix. Dimensions are really important as some operations are possible only with matrices with identical dimensions. They can be added, subtracted, multiplied by a scalar or among themselves. However, such operations can take quite a long time and this where SIMD comes in.
A SIMD (https://en.wikipedia.org/wiki/SIMD) (Single-Instruction-Multiple-Data) instruction set describes an extension in microprocessors that allows them to operate data in parallel. The method for achieving parallelism by a single core is called Vectorization. What SIMD instructions basically do is operating on multiple pieces of data at the same time. While SISD (Single-Instruction-Single-Data) uses a separate register for each value to be added (e.g. addition operation), the SIMD instruction will fill one register with all the values(“packing” the register). The following image should illustrate the example:

Let’s illustrate this concept with some C code.
//SISD code
float x[3] = {6, 4, 24};
float y[3] = {1, -9, 8};
float z[3];

for (int i = 0; i < 3; i++) {
      z[i] = x[i] + y[i];
}
Looping through every single array element would be really slow especially when dealing with multiple arrays. We can do all these iterations with one single instruction instead:
//SIMD code
simd_float3 x = simd_make_float3(6, 4, 24);
simd_float3 y = simd_make_float3(1, -9, 8);

simd_float3 z = x + y;
This is extremely useful for multimedia applications, as they demand significant processing speed for video processing, speech recognition, MP3 etc. SIMD registers and operations are the low-level ingredients to SIMD programming. Higher-level abstractions are built on top of these such as simd_float4x4, simd_float3x3 etc. (matrix_float and matrix_double types are just typedef-s based on simd_float and simd_double) in iOS frameworks. For detailed SIMD library documentation see https://developer.apple.com/documentation/accelerate/simd.
This should be enough theory for now (though we have some more later). I will list some useful resources on this topic at the bottom of the article.
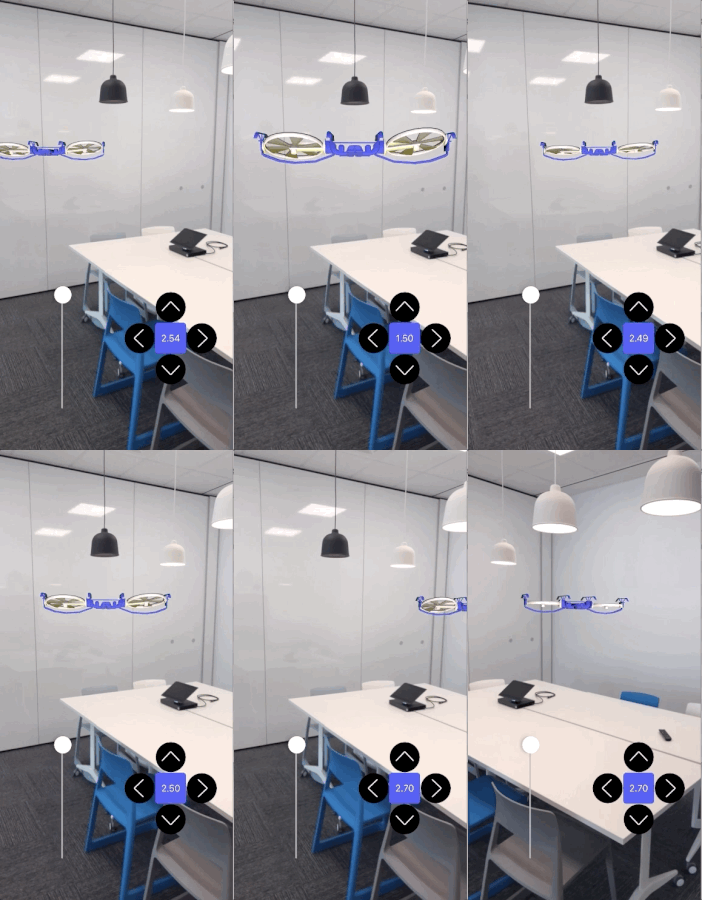
For the purpose of this article I built a simple ARKit app based on a tutorial by Medium user chriswebb09 - https://medium.com/journey-of-one-thousand-apps/aarkit-adventures-697dfbe7779e. I will demonstrate the usage of matrices by adding a label showing the distance between us and the demo’s drone.
NOTE: You need to install the NativeScript CLI and have a physical iOS device in order to run this demo.
Let’s first clone the repo:
git clone -b simd-tutorial https://github.com/tdermendjiev/nativescript-ardrone.git ARDrone

cd ARDrone
Now we can run the app on device (it won’t work on simulator as we need camera access):
tns run ios

So far so good. Let’s add the label showing the distance.
<Label row="1" col="1" id="distanceLabel" textWrap="true"/>
main-page.xml
<Page xmlns="http://schemas.nativescript.org/tns.xsd" loaded="pageLoaded" class="page" xmlns:DroneSceneView="./DroneSceneView">
 <StackLayout>
   <iOS>
       <DroneSceneView:DroneSceneView height="100%"
           arLoaded="arLoaded" id="scene">

           <GridLayout columns="auto, *" rows="auto" width="100%"  class="slider" verticalAlignment="bottom">

               <Slider row="0" col="0" id="heightSlider" width="200" height="100" loaded="onSliderLoaded" value="0.5"  minValue="0" maxValue="1"/>
               <GridLayout row="0" col="1" columns="50,50,50" rows="50,50,50" width="300" top="20">
                   <Image row="0" col="1" tap="moveForward" src="~/arrow.png"></Image>
                   <Image row="1" col="0" tap="moveLeft" id="leftArrow" src="~/arrow.png"></Image>
                   <Label row="1" col="1" id="distanceLabel" textWrap="true"/>
                   <Image row="1" col="2" tap="moveRight" id="rightArrow" src="~/arrow.png"></Image>
                   <Image row="2" col="1" tap="moveBack" id="backArrow" src="~/arrow.png"></Image>
               </GridLayout>
           </GridLayout>

       </DroneSceneView:DroneSceneView>
   </iOS>
 </StackLayout>
</Page>
Next, let’s give it a nice NativeScript color and style:
app.css
#distanceLabel {
  background-color: #3f56f7;
  font-size: 15;
  color: white;
  border-radius: 5;
  width: 100;
  text-align: center;
}
And now back to the vectors. We usе the Pythagorean theorem to derive a formula for finding the distance between to points A and B in the 2D space:
AB = ((x2 - x1)2 + (y2 - y1)2)1/2
So for three dimensions we just add the third (z) axis and the formula becomes:
AB = ((x2 - x1)2 + (y2 - y1)2 + (z2 - z1)2)1/2

Cool, but how do we find the coordinates of our two objects - the camera and the drone?
For the camera we will use ARCamera’s transform property:
This transform creates a local coordinate space for the camera that is constant with respect to device orientation. In camera space, the x-axis points to the right when the device is in landscapeRight orientation—that is, the x-axis always points along the long axis of the device, from the front-facing camera toward the Home button. The y-axis points upward (with respect to landscapeRight orientation), and the z-axis points away from the device on the screen side.
The drone’s coordinates are represented by its position property.
Let’s create the method responsible for distance calculations:
function calculateDistanceFromCamera(scene, to) {
    var camera = scene.sceneView.session.currentFrame.camera;//1
    var transform = camera.transform;//2
    var dx = to.position.x - transform.columns[3][0];//3
    var dy = to.position.y - transform.columns[3][1];
    var dz = to.position.z - transform.columns[3][2];
    var meters = Math.sqrt(dx * dx + dy * dy + dz * dz);//4
    return meters;
}
- In order to get a reference to the camera we need current scene’s
currentFrameproperty. - As I mentioned above we need camera’s
transform. - An object’s coordinates is derived by its
transformproperty like this:
var x = transform.columns[3][0];
var y = transform.columns[3][1];
var z = transform.columns[3][2];
The 4th row of the 4x4 matrix is the coordinate row and its first three elements are x, y and z coordinates respectively. You can learn more on this by reading about transformation matrices https://en.wikipedia.org/wiki/Transformation_matrix .
dx, dy and dz are the distances between each of the coordinates.
- Here we use the distance formula.
Let’s say the distance will be updated every time the drone moves any of the directions. Add a call to updateDistance() method in each of our joystick button callbacks:
main-page.ios.ts
export function moveForward(args: any) {
 let scene = args.object.parent.parent.parent;
 let dronePos = scene.helicopterNode.position
 scene.moveDrone(dronePos.x, dronePos.y, dronePos.z + 0.5);
 updateDistance(scene);
}

export function moveBack(args: any) {
 let scene = args.object.parent.parent.parent;
 let dronePos = scene.helicopterNode.position
 scene.moveDrone(dronePos.x, dronePos.y, dronePos.z - 0.5);
 updateDistance(scene);
}

export function moveLeft(args: any) {
 let scene = args.object.parent.parent.parent;
 let dronePos = scene.helicopterNode.position
 scene.moveDrone(dronePos.x - 0.5, dronePos.y, dronePos.z);
 updateDistance(scene);
}
export function moveRight(args: any) {
 let scene = args.object.parent.parent.parent;
 let dronePos = scene.helicopterNode.position
 scene.moveDrone(dronePos.x + 0.5, dronePos.y, dronePos.z);
 updateDistance(scene);
}
Now implement the updateDistance() method:
function updateDistance(scene: any) {
 let distanceLabel = scene.parent.getViewById("distanceLabel");
 var distance = calculateDistanceFromCamera(scene, scene.helicopterNode);

 if (distance && distanceLabel) {
   distanceLabel.text = distance.toFixed(2);
 }
}
If we run the app again, the label will be updated every time we move the drone.
Calculating distance between objects in 3D space is slightly scratching the surface of everything possible to be done using matrices data. The great news is it can now be done with NativeScript, so go hack some AR!

References and useful resources:
- https://medium.com/journey-of-one-thousand-apps/aarkit-adventures-697dfbe7779e
- https://www.amazon.com/Linear-Algebra-Its-Applications-4th/dp/0030105676
- https://software.intel.com/en-us/blogs/2012/01/31/vectorization-find-out-what-it-is-find-out-more
- https://gcc.gnu.org/onlinedocs/gcc/Vector-Extensions.html
- http://www.opengl-tutorial.org/beginners-tutorials/tutorial-3-matrices/
- https://developer.apple.com/videos/play/wwdc2018/701/
- https://forum.openframeworks.cc/t/a-guide-to-speeding-up-your-of-app-with-accelerate-osx-ios/10560