Develop Vision Pro 🥽 apps with Solid
Vision Pro offers new realities for app development. Let's learn how to build for visionOS with Solid.
NativeScript 8.6 brings support for developing Vision Pro apps with any JavaScript flavor you love. It allows you to mix JavaScript development practices with SwiftUI in exciting ways. This post will focus on Solid.
Refer to the Developing with visionOS guide for more details.
Create a visionOS Solid app
We are providing
visiontagged npm packages to keep things distinct while you develop for visionOS.
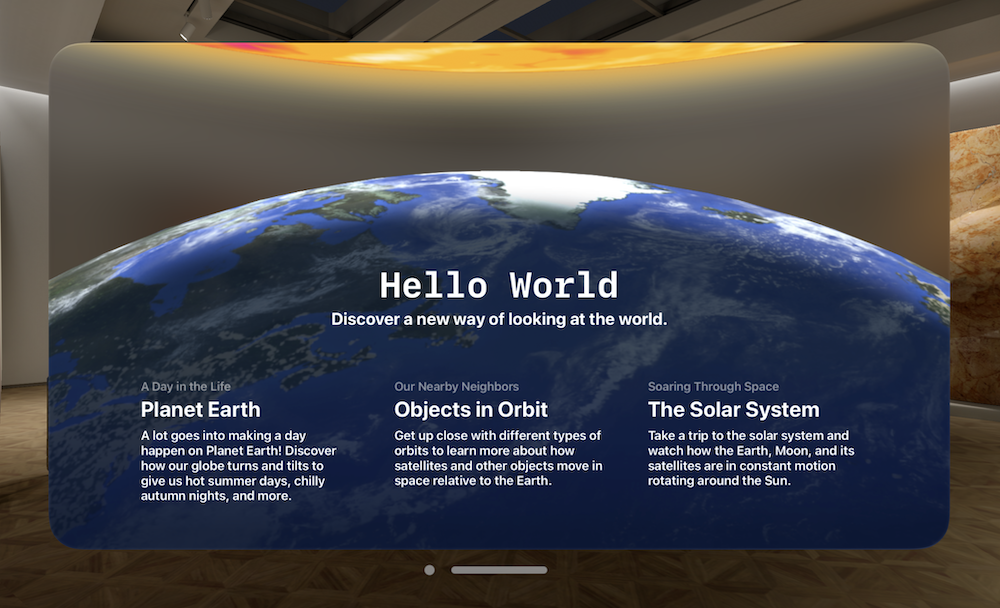
We will walk through a rather sophisticated visionOS Hello World Tutorial to demonstrate the breakthrough development possibilities which NativeScript 8.6 enables.
Choose to 'Download' the source code from the Apple tutorial as we will integrate directly with SwiftUI samples provided.
- Install:
npm install -g nativescript@vision - Create the app:
ns create myapp --vision-solid
We now have a Vision Pro project ready to develop.
Building the Hello World Main Window
We can build this screen with Solid:
We will want to use a few Assets provided from the visionOS Hello World Tutorial so if you've downloaded the project, we can move a few Assets into our Vision Pro project to use.
Drag/drop the following Assets from the downloaded sample:
EarthHalf.imagesetGlobeHero.imagesetSolarBackground.imagesetSolarHero.imagesetStarfield.imagesetSunSliver.imagesetTrailGradient.imageset
To App_Resources/visionOS/Assets.xcassets:
When we run our Vision Pro project, the NativeScript CLI will configure these assets with the visionOS project for us to use with our development.
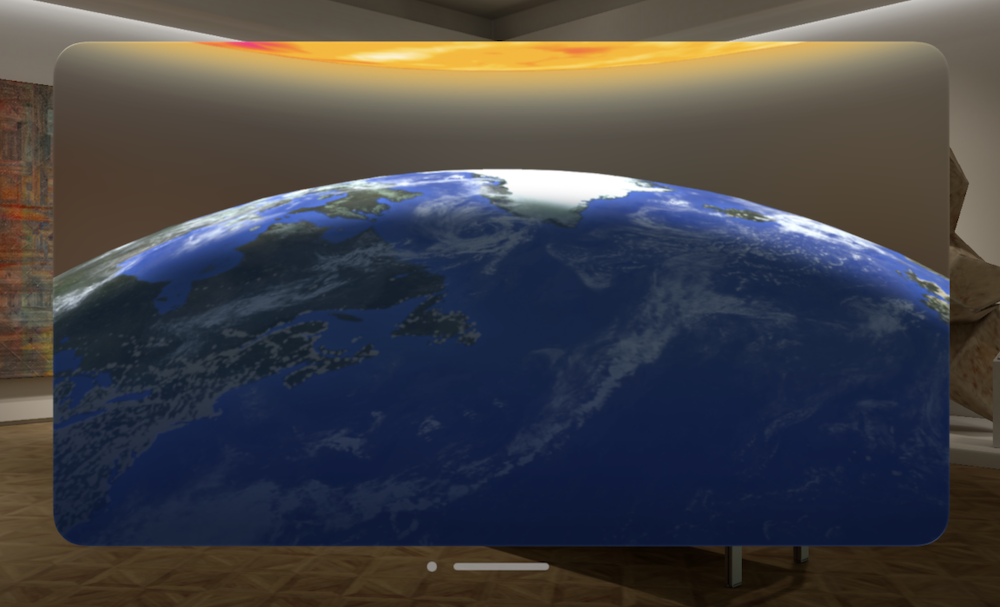
We can now build the background for our main window as follows:
export const Home = () => {
  return (
    <gridlayout>
      <image
        src="res://SunSliver"
        className="align-top w-full"
        iosOverflowSafeArea={true}
        stretch="aspectFit"
        scaleY={1.6}
        scaleX={1.6}
        translateY={30}
      />
      <image
        src="res://EarthHalf"
        className="align-bottom w-full"
        iosOverflowSafeArea={true}
        stretch="aspectFill"
        scaleY={2}
        scaleX={2}
        translateY={540}
      />
    </gridlayout>
  );
};
We should see the following when we run: ns run vision --no-hmr:
Mixing SwiftUI with NativeScript
The Hello World tutorial uses a "typewriter style" animation when the app launches before showing the main window contents. We could use the NativeScript Animation API to create this but we also have a lot of options here. For example, we can also use SwiftUI for the title animation alongside our Solid driven development.
You can integrate any SwiftUI into your NativeScript project in 2 steps:
- Create a provider to use the title animation.
- Use
<swiftui />in your view markup.
Just be sure you've installed the plugin,
npm install @nativescript/swift-ui@vision
We can move any .swift code into our NativeScript app by placing it inside the App_Resources/{platform}/src directory inside any Apple supported platform.
Since we are developing for visionOS, we can move the .swift files from the Hello World Tutorial into App_Resources/visionOS/src and the NativeScript CLI will build the .swift files into our app for usage anywhere.
Learn more about integrating SwiftUI with NativeScript here. You can also open
platforms/visionos/{project}.xcodeprojin Xcode to develop any.swiftfrom there. You will find any native sources place inApp_Resources/visionOS/srclocated in theNSNativeSourcesfolder from within Xcode.
TitleText from the Apple tutorial can be provided to NativeScript as follows:
import SwiftUI
import UIKit

@objc
class TitleViewProvider: UIViewController, SwiftUIProvider {
  required init?(coder aDecoder: NSCoder) {
    super.init(coder: aDecoder)
  }

  required public init() {
    super.init(nibName: nil, bundle: nil)
  }

  public override func viewDidLoad() {
    super.viewDidLoad()
    setupSwiftUIView(content: IntroText(finished: {
        self.onEvent?([:])
    }))
  }

  func updateData(data: NSDictionary) {}
  var onEvent: ((NSDictionary) -> ())?
}

private struct TitleText: View {
    var title: String
    var body: some View {
        Text(title)
            .monospaced()
            .font(.system(size: 50, weight: .bold))
    }
}

@Observable
class TitleViewModel {
    var titleText: String = ""
    var isTitleFinished: Bool = false
    var finalTitle: String = "Hello World"
}

struct IntroText: View {
    @State var model = TitleViewModel()
    var finished: (() -> Void)

    var body: some View {
        @Bindable var model = model

        // A hidden version of the final text keeps the layout fixed
        // while the overlaid visible version types on.
        VStack {
            // A hidden version of the final text keeps the layout fixed
            // while the overlaid visible version types on.
            TitleText(title: model.finalTitle)
                .padding(.horizontal, 70)
                .hidden()
                .overlay(alignment: .leading) {
                    TitleText(title: model.titleText)
                        .padding(.leading, 70)
                }
            Text("Discover a new way of looking at the world.")
                .font(.title)
                .opacity(model.isTitleFinished ? 1 : 0)
        }
        .typeText(
            text: $model.titleText,
            finalText: model.finalTitle,
            isFinished: $model.isTitleFinished,
            isAnimated: !model.isTitleFinished)
        .animation(.default.speed(0.25), value: model.isTitleFinished)
        .onChange(of: model.isTitleFinished) {
            if (model.isTitleFinished) {
                finished()
            }
        }
    }
}
The onChange(of: model.isTitleFinished) is what will notify our NativeScript app when the title has finished it's animation sequence so we can fade in our main window seamlessly.
We can then add the SwiftUI to our view as follows:
import { viewBindings } from '@vision/nativescript-data';

export const Home = () => {
  const ui = viewBindings;
  return (
    <gridlayout>
      <gridlayout on:loaded={ui.loadedBg}>
        <image
          src="res://SunSliver"
          className="align-top w-full"
          iosOverflowSafeArea={true}
          stretch="aspectFit"
          scaleY={1.6}
          scaleX={1.6}
          translateY={30}
        />
        <image
          src="res://EarthHalf"
          className="align-bottom w-full"
          iosOverflowSafeArea={true}
          stretch="aspectFill"
          scaleY={2}
          scaleX={2}
          translateY={540}
        />
      </gridlayout>

      <swiftui
        swiftId="title"
        on:swiftUIEvent={ui.onTitleFinished}
        className="align-middle"
      />
    </gridlayout>
  );
};
By defining some on:loaded events to control the opacity of our background image layout, we can now allow SwiftUI to interact with our entire composition to achieve this:
Pretty neat indeed!
Continuing onward with Volumetric window styles and Immersive spaces
We can use all these techniques to build out the rest of the Hello World tutorial in NativeScript. For example, we can actually move the entire .swift resources from the tutorial into App_Resources/visionOS/src and interact with all the SwiftUI provided.
We can expand our App_Resources/visionOS/src/NativeScriptApp.swift file to support volumetric window styles and Immersive Spaces with new Scene types available in visionOS.
Apple's Hello World tutorial utilizes a local Swift Package containing all the 3D world assets utilized. You can move the Packages folder to the root of your NativeScript project.
With NativeScript 8.6, we can also configure our project to consume that Swift Package locally by modifying nativescript.config.ts with the following:
// ...
ios: {
  SPMPackages: [
    {
      name: 'WorldAssets',
      libs: ['WorldAssets'],
      path: './Packages/WorldAssets'
    },
  ]
}
This assumes you placed the Packages folder from the Apple tutorial at the root of your project. Local swift packages can be referenced relative to your project directory.
We could then configure more scenes in our App_Resources/visionOS/src/NativeScriptApp.swift using the Apple tutorial as a guide:
import SwiftUI
import Observation
import WorldAssets

@main
struct NativeScriptApp: App {

    // The view model.
    @State private var model = ViewModel()

    // The immersion styles for different modules.
    @State private var orbitImmersionStyle: ImmersionStyle = .mixed
    @State private var solarImmersionStyle: ImmersionStyle = .full

    var body: some Scene {
        // Your NativeScript Main Window
        NativeScriptMainWindow()

        // A volume that displays a globe.
        WindowGroup(id: Module.globe.name) {
            Globe()
                .environment(model)
        }
        .windowStyle(.volumetric)
        .defaultSize(width: 0.6, height: 0.6, depth: 0.6, in: .meters)

        // An immersive space that places the Earth with some of its satellites
        // in your surroundings.
        ImmersiveSpace(id: Module.orbit.name) {
            Orbit()
                .environment(model)
        }
        .immersionStyle(selection: $orbitImmersionStyle, in: .mixed)

        // An immersive Space that shows the Earth, Moon, and Sun as seen from
        // Earth orbit.
        ImmersiveSpace(id: Module.solar.name) {
            SolarSystem()
                .environment(model)
        }
        .immersionStyle(selection: $solarImmersionStyle, in: .full)
    }

    init() {
        // Register all the custom components and systems that the app uses.
        RotationComponent.registerComponent()
        RotationSystem.registerSystem()
        TraceComponent.registerComponent()
        TraceSystem.registerSystem()
        SunPositionComponent.registerComponent()
        SunPositionSystem.registerSystem()
    }
}
In order to add volumetric and immersize spaces, be sure you add the following setting to your App_Resources/visionOS/Info.plist:
<key>UIApplicationSceneManifest</key>
<dict>
    <key>UIApplicationSupportsMultipleScenes</key>
    <true/>
</dict>
What is possible here?
Beyond what is already possible, the innovative potential is rather stunning as this is the beginning of an entirely new world. The @nativescript/core library along with 3rd party plugins could provide even more SwiftUI providers for Solid usage to enable exciting and powerful development workflows.
Sample repo to enjoy a new reality
You can reference this repo for more integration details.
A new reality awaits you! 🛸