Calcu{N}ator - the NativeScript Calculator
I’ve built a little calculator to mimic the calculator app that ships with iOS and thought I’d share the techniques I’ve used. Even though implementing a calculator is a pretty trivial task in itself, doing so is a good way to learn some concepts about a new technology. NativeScript is a fairly new technology that offers many extensibility points. By building a calculator in NativeScript you will learn these concepts and how these features work together.

Note: This calculator is a simple version with four basic functions; divide, multiply, add, and subtract, I leave the scientific calculator implementation for another post.
Concepts Demonstrated by the NativeScript Calculator App
Running the Calculator App
This post shows how a simple iOS calculator clone was built. The sample app code is available for free on GitHub. Follow these steps to run the app yourself. Make sure you have NativeScript installed. If you need help with that, check out the getting started guide.Clone the git repository to your local Mac
This will download the code from GitHub into a directory calledgit clone https://github.com/alexziskind1/nativescript-calculator-demoapp.git
nativescript-calculator-demoapp. Navigate to that directory in your Terminal so you can execute NativeScript commands
Add the iOS platform to the project to prepare it for running on the simulator or devicecdnativescript-calculator-demoapp
Now you’re ready to run the app. If you want to run the app in the iOS simulator, execute the emulate commandtns platform add ios
You could also run it directly on your iPhone, just connect the phone to your Mac via USB and execute the run commandtns emulate ios
The calculator should open in your simulator or device and will look like thistns run ios
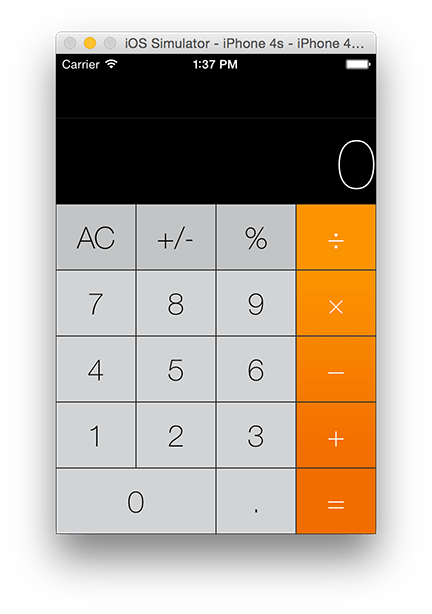
Taking it Apart
Now that you ran the app and maybe even looked at the code, you might be curious about how some of the things come together. The sections below will explain some of the techniques used in the app.Setting a Background Image
NativeScript supports setting the background color as a CSS property on UI Elements. This is a pretty common task that we’re all used to doing even in the web world. And you can see examples of this in the calculator app by opening the app.css fileThe iOS calculator app has a slight gradient in the actions strip on the right side that ranges from West Side to Ecstacy. Or as I call them, from lighter orange to darker orange..label-back {background-color:#202020;padding-top:50;}
We can’t use a background color to simulate this gradient just yet. The easiest way to get this effect is to use a background image which is included in the res folder of the app.
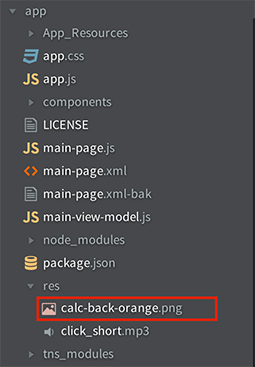
The gradient image is a slightly exaggerated version of the iOS calculator gradient, for effect. Here are the background image and the actions strip with buttons using it as the background.
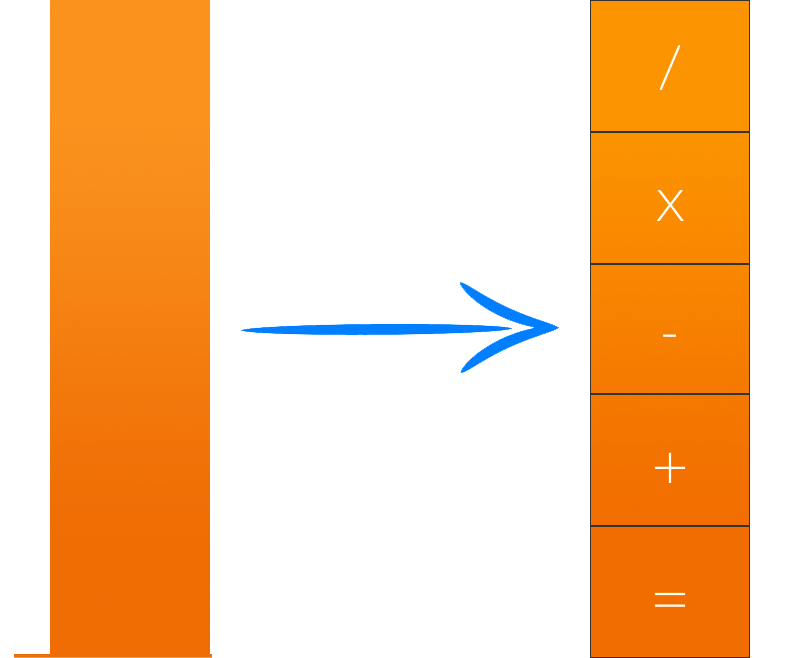
The actions strip is built by using a
GridLayout for which the background image is set in the JavaScript code on load of the GridLayout.This will load the image from the bundle and set the grid’s background to use the image. There are several techniques to set the background of the layout that are detailed in my post on the topic.functionactionsGridLoaded(args) {vartheView = args.object._view;if(args.object.ios) {theView.layer.contents = UIImage.imageNamed("app/res/calc-back-orange.png").CGImage;}}exports.actionsGridLoaded = actionsGridLoaded;
Using Multiple Nested Layouts
Naturally, layouts should have the ability to be nested and NativeScript gives plenty of options to find the right combinations. The calculator app demonstrates the use of three layout types: DockLayout, StackLayout, and GridLayout, with multiple levels of nesting.
<DockLayout stretchLastChild="true">
<StackLayout dock="top">
…
</StackLayout>
<GridLayout rows="*, *, *, *, *" columns="*, *, *, *" dock="bottom">
…
<GridLayout rowSpan="5" col="3" rows="*, *, *, *, *" columns="*">
…
</GridLayout>
</GridLayout>
</DockLayout>
Overriding Default UI Elements
While NativeScript supports a lot of common native functionality out of the box, there are times where you want to reach just a little further, do just a little extra with those controls. And the beauty of it is that you absolutely can do this since NativeScript lets you get down to the native level if you need it.
One such need is in the way the iOS calculator numeric display works. The size of the font stays the same until a certain number of digits are entered. Once the number of digits exceeds the width of the display, the font automatically starts to decrease in size. This is a great effect and natively supported by setting a property on a label in iOS.
We can tap into this ability by extending the label that comes with NativeScript. The following code shows how to extend the Label element by setting the native underlying iOS label property called adjustsFontSizeToFitWidth.
Note: In the code below and further in the post, I reference a function called
__extends. You can see its definition at the end of the post.This code creates a new label type calledvarScalingLabel = (function(_super) {__extends(ScalingLabel, _super);functionScalingLabel () {_super.call(this);this.mylabel = UILabel.alloc().init();this._ios.adjustsFontSizeToFitWidth =true;this.ios.font = UIFont.fontWithNameSize("HelveticaNeue-UltraLight", 80);this.ios.addSubview(this.mylabel );}returnScalingLabel;})(label.Label);exports.ScalingLabel = ScalingLabel;
ScalingLabel which is going to automatically adjust its font size based on the number of digits that are shown in the calculator display. The calculator app has extra components such as the ScalingLabel in the components folder in a file called calccomponents.ios.js.
To use this new label in our XML, the top level
Page element is provided with another attribute that points to the location of the code file that defines the ScalingLabel.<Page xmlns:cc="components/calccomponents" xmlns="http://schemas.nativescript.org/tns.xsd"
loaded="pageLoaded">
...
</Page>
And finally we can place the actual
ScalingLabel in our page<cc:ScalingLabel text="{{ mainLabelText }}" cssClass="display" />
Adding Sound to Your App
When clicking around on the iOS Calculator, you will hear a little key tap sound with each click. To simulate this, we will jump a layer down into a native iOS library for audio playback. NativeScript is good enough to expose theAVAudioPlayer class that is part of the AVFoundation framework, which is exactly what we’ll be using here.Included in the bundle is an mp3 file that is a click sound.
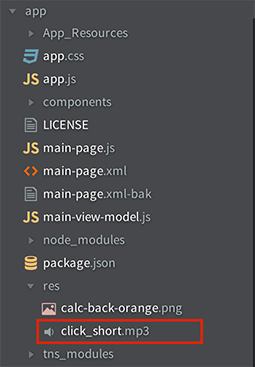
To make the buttons produce the click sound, we create a new module in our NativeScript project. Only the iOS version will be shown here, but an android version can be just as easily created.
The file called clicker.ios.js contains the module that will maintain a living reference to the audio player. The module will create a new instance of theAVAudioPlayer and expose a single function called click to be triggered any time a button is tapped.In the view model we maintain a reference to the clicker class and call it when needed.varClicker =function(resource) {varsoundPath = NSBundle.mainBundle().pathForResourceOfType("app/"+resource,"mp3");varsoundUrl = NSURL.fileURLWithPath(soundPath);varplayer = AVAudioPlayer.alloc().initWithContentsOfURLError(soundUrl,null);player.prepareToPlay();this.click =function() {player.currentTime = 0.0;player.play();};};module.exports.Clicker = Clicker;
When a button in the UI is tapped, thevarCalc = (function(_super) {__extends(Calc, _super);functionCalc() {_super.call(this);varself =this;this.clicker =newclicker.Clicker("res/click_short");…}}
click function is called and the player plays the click sound.…Calc.prototype.btnTapEq =function() {this.playSound();this.equalsPressed();};Calc.prototype.playSound =function() {this.clicker.click();};…
Changing Fonts Used by Your UI Elements
There is an extra bit of shine that can be added to the app by using other fonts available on the iOS device, or even your own fonts. While the calculator works just fine without changing the font, we can make it look a little more like the iOS calculator by changing the fonts of the numeric display and all the buttons.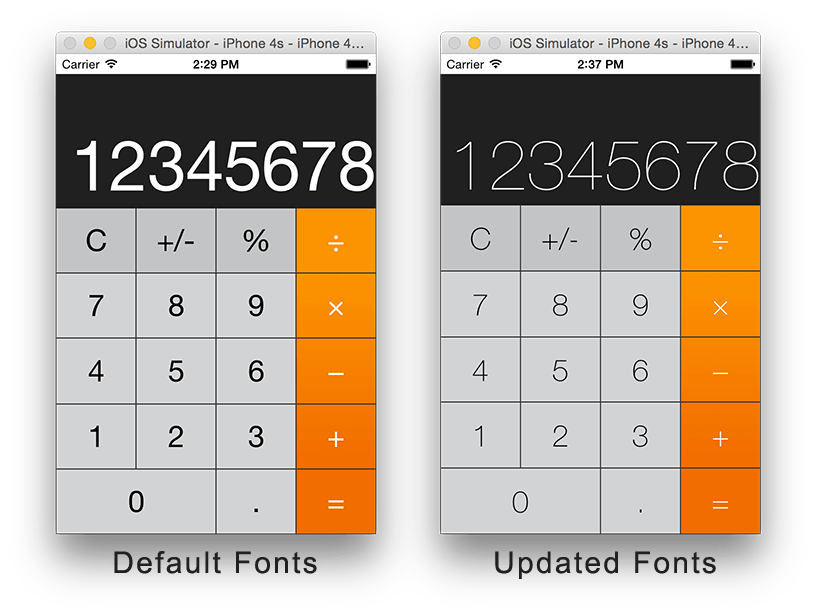
You’re probably thinking, they both look fine, why would I care about these minute differences in fonts? But it’s the little things that matter in modern app design and fonts are a very important part of the equation.
Our calculator app uses two types of UI elements that need to have their font updated
- The numeric display at the top is a Label
- The buttons below the display are all instances of the Button element
At the time of this writing, NativeScript doesn’t allow setting the font in CSS, so we have to do this programmatically. One of the techniques to change the font of these elements is to inherit from the elements that are bundled with NativeScript already. Check out the Overriding Default UI Elements section above for the technique. This effectively exposes the native UI element to us so we can change the font as the highlighted line shows
See my post on fonts for more details on font techniques with NativeScript, as well as using custom fonts.varbutton = require("ui/button/button");varFontButton = (function(_super) {__extends(FontButton, _super);functionFontButton() {_super.call(this);this.mybutton = UIButton.alloc().init();this.ios.font = UIFont.fontWithNameSize("HelveticaNeue-Thin", 80);this.ios.addSubview(this.mybutton );}returnFontButton;})(button.Button);exports.FontButton = FontButton;
Handling UI Element Loaded Events
If you’ve spent any time with NativeScript already, you must have noticed the loaded attribute on the Page element in the XML. Well, the Page element is not the only UI Element that triggers the loaded event. You can add load handlers to layouts, buttons, label, etc. All you have to do it add the loaded attribute to the element in XML and specify the handler that’s exposed in the JavaScript code.

The actions strip is built by using a
GridLayout with an attached loaded handler<GridLayout loaded="actionsGridLoaded" rowSpan="5" col="3" rows="*, *, *, *, *" columns="*">
…
</GridLayout>
We define and export the handler function itself in the page JavaScript code file
The loaded event handler received a reference to the underlying view object which we can manipulate and set the background image to the view’s layer property.functionactionsGridLoaded(args) {vartheView = args.object._view;if(args.object.ios) {theView.layer.contents = UIImage.imageNamed("app/res/calc-back-orange.png").CGImage;}}exports.actionsGridLoaded = actionsGridLoaded;
Summary
If you haven’t already done so, grab the calculator code from GitHub, run it and see how all the pieces interact with each other. Use this post to help guide you through certain concepts that might not be in the documentation yet. Then go and build your own app!
Special thanks to Valentin Stoychev and TJ VanToll for their help on this post.
Definitions
__extends function - this function simulates inheritance by copying all parent properties to child classes.var__extends =this.__extends ||function(d, b) {for(varpinb)if(b.hasOwnProperty(p)) d[p] = b[p];function__() {this.constructor = d; }__.prototype = b.prototype;d.prototype =new__();};