How to add visionOS to an existing app?
You can add visionOS support to an existing NativeScript app anytime. Let's discuss how.
Let's discuss how you can add visionOS support to any existing NativeScript app by including the App_Resources/visionOS folder.
Create a visionOS app
We can get the latest visionOS resource folder by creating a visionOS app.
ns create myapp --vision
This will setup a preconfigured visionOS ready app.
The flavor doesn't matter since we are creating the app just to grab the App_Resources/visionOS folder.
But for reference, you can also use any of the following:
- Angular:
ns create myapp --vision-ng - React:
ns create myapp --vision-react - Solid:
ns create myapp --vision-solid - Svelte:
ns create myapp --vision-svelte - Vue (3.x):
ns create myapp --vision-vue
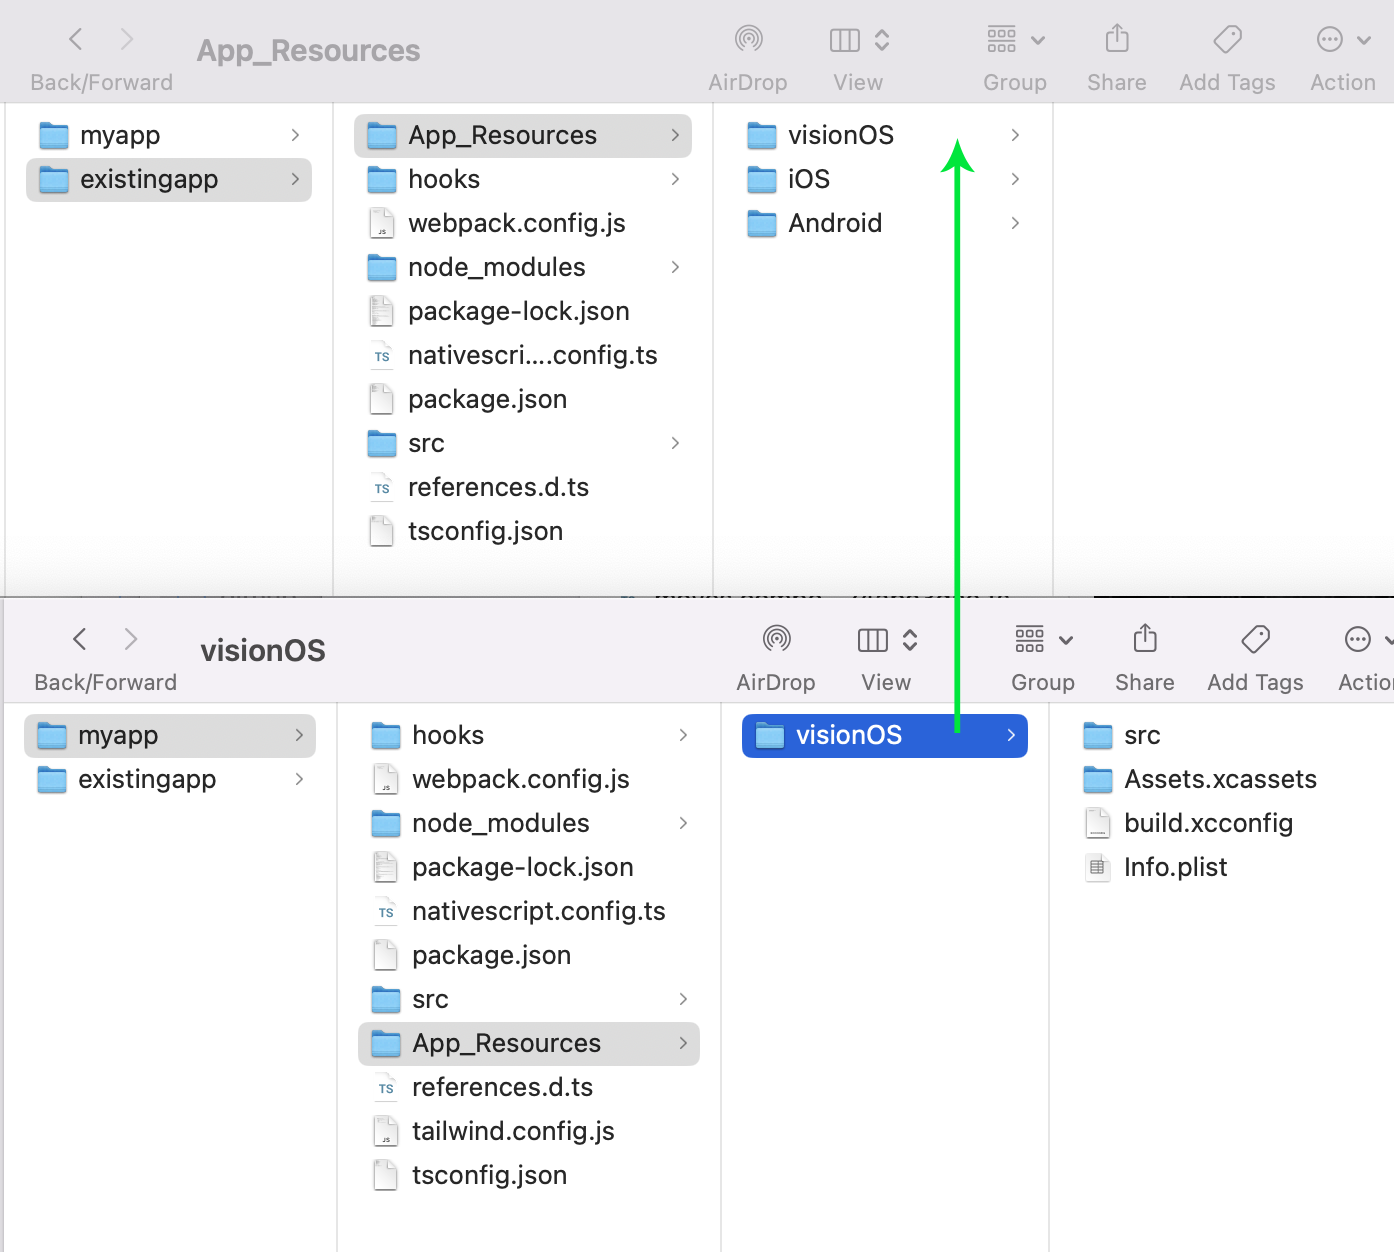
Moving the visionOS folder into place
You can now move the myapp/App_Resources/visionOS folder into your own app's resources folder.
Run your app on Vision Pro Simulator
You can now run your app on the Vision Pro Simulator with:
ns run visionos --no-hmr
You can actually use visionOS with HMR as well. See below for some flavor considerations. Generally with HMR the main consideration is that routing is often not preserved on HMR updates out of the box. Mentions of this are in this video tutorial.
Considerations for visionOS
Your existing app likely includes plugins which utilize CocoaPods and some may still need visionOS support. A lot of vendors have added support by the time of this article but if you encounter a build error you may want to check your plugins.
TouchManager
You may want to use specific visionOS features mentioned in the docs like the following:
TouchManager.enableGlobalHoverWhereTap = true;
TouchManager.visionHoverOptions = {
  default: {
    effect: 'highlight',
    shape: 'rect',
    shapeCornerRadius: 16,
  },
};
These TouchManager settings can be set without any conditional handling because they will only be enabled when your app is run on visionOS.
View platform specifiers
You may also want to work with visionOS specific view features like Model3D from @nativescript/swift-ui. You can register the element for use in your app and just surround it by the visionos platform directive filter for views.
<visionos>
  <Model3D src="file.usdz" />
</visionos>
Model3D is explained in this video tutorial.
Platform conditionals
Platform conditionals where desired can be handled in several ways:
if (__IOS__) {
  // iOS specific
}

if (__VISIONOS__) {
  // visionOS specific
}

if (__APPLE__) {
  // both iOS and visionOS
}
Angular consideration
When running your app on visionOS, you are actually embedding your app into a SwiftUI App Lifecycle since visionOS is a first class SwiftUI platform.
You'll want to use the embedded flag in your bootstrap main.ts when doing standard development on visionOS like this:
runNativeScriptAngularApp({
  embedded: __VISIONOS__,
  appModuleBootstrap: () => platformNativeScript().bootstrapModule(AppModule),
});
Note: Without this set for visionOS, your app will not boot at all when using the "--no-hmr" flag.
Deployment to Store
When ready to deploy your Vision Pro app to the store you can prepare it with:
ns prepare visionos --release

ns open visionos
This will prepare the app for release and then you can open the visionOS app in Xcode with ns open visionos to do a Project > Archive to upload it to TestFlight.
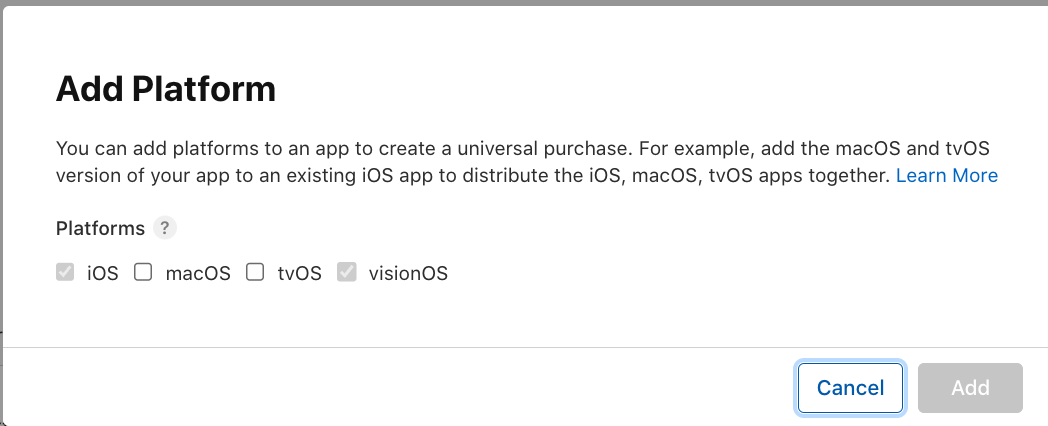
Within App Store Connect, you'll want to make sure you've added visionOS as a supported platform:
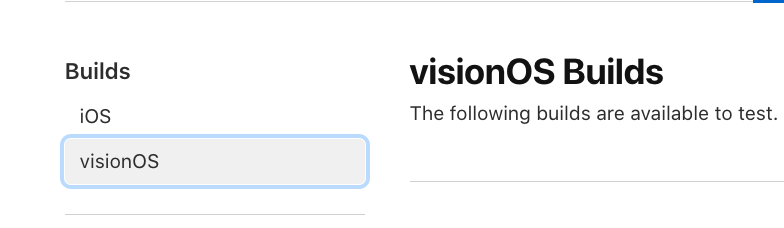
Upon uploading your visionOS release, you will begin seeing them show up under TestFlight > "visionOS Builds":
Share your visionOS journey in Discord
We would love to hear about your visionOS journey in the #visionos channel in our community Discord!