Add a Home Screen Widget to your iOS App
Extend your NativeScript App to the Lock Screen on IOS
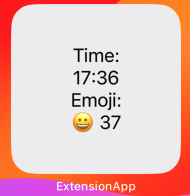
In this article we’ll look at how to develop a Home Screen Widget for your NativeScript iOS app. If you follow the steps in this article, you will build a simple Widget that looks like this:
There are a couple of things to note before we start:
- iOS extensions must be built with native code using Xcode. And because Xcode only runs on macOS, the following steps can only be performed on a Mac.
- Extensions require their own Application Identifier and their own Provisioning Profile, the approach taken here is to append
.widgetto your Application's Identifier.
Setup our Test Project
Let's create a sample project (replace com.nativescript.ExtensionApp with your app Identifier):
ns create ExtensionApp --template @nativescript/template-hello-world-ts --appid com.nativescript.ExtensionApp
cd ExtensionApp
ns prepare ios
Create Widget
Open Xcode, and open the project we have created in ExtensionApp/platforms/ios/ExtensionApp.xcodeproj,
NOTE: A larger app will have a .xcworkspace which is what you should open in that case.
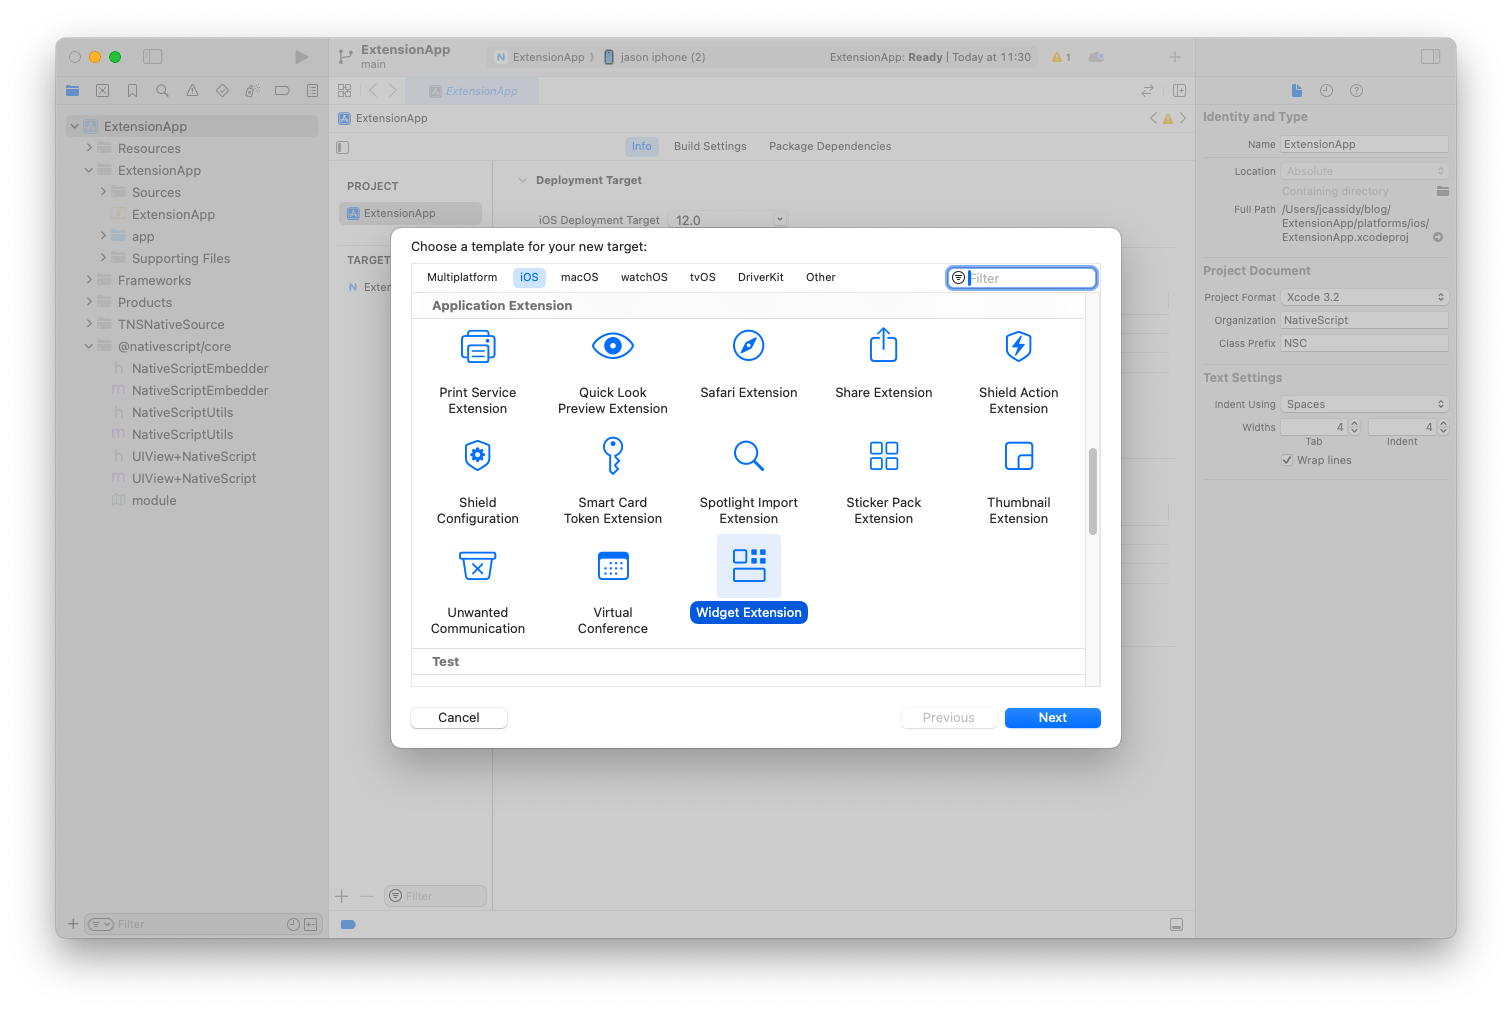
Open the File, New, Target.. menu item.
For the iOS platform select Widget Extension, and click Next.
- Enter
widgetas the project name, and deselectInclude Live ActivityandInclude Configuration App Intent. - Click Finish.
- Click Activate to Activate the Scheme.
The project is now populated with some sample widget code.
Move the widget code into your NativeScript Project
Create a folder App_Resources/iOS/extensions.
Copy the folder platforms/ios/widget into App_Resources/iOS/extensions, such that you now have a folder App_Resources/iOS/extensions/widget.
Create a file App_Resources/iOS/extensions/widget/extension.json
Add the content:
{
    "frameworks": ["SwiftUI.framework", "WidgetKit.framework"],
    "targetBuildConfigurationProperties": {
        "ASSETCATALOG_COMPILER_GLOBAL_ACCENT_COLOR_NAME" : "AccentColor",
        "ASSETCATALOG_COMPILER_WIDGET_BACKGROUND_COLOR_NAME" : "WidgetBackground",
        "CLANG_ANALYZER_NONNULL" : "YES",
        "CLANG_ANALYZER_NUMBER_OBJECT_CONVERSION" : "YES_AGGRESSIVE",
        "CLANG_CXX_LANGUAGE_STANDARD" : "\"gnu++20\"",
        "CLANG_ENABLE_OBJC_WEAK" : "YES",
        "CLANG_WARN_DOCUMENTATION_COMMENTS" : "YES",
        "CLANG_WARN_UNGUARDED_AVAILABILITY" : "YES_AGGRESSIVE",

        "CURRENT_PROJECT_VERSION" : 1,
        "GCC_C_LANGUAGE_STANDARD" : "gnu11",
        "GCC_WARN_UNINITIALIZED_AUTOS" : "YES_AGGRESSIVE",
        "GENERATE_INFOPLIST_FILE": "YES",

        "INFOPLIST_KEY_CFBundleDisplayName" : "widget",

        "INFOPLIST_KEY_NSHumanReadableCopyright" : "\"Copyright © 2023 NativeScript. All rights reserved.\"",
        "IPHONEOS_DEPLOYMENT_TARGET" : 16.4,

        "MARKETING_VERSION" : "1.0",

        "MTL_FAST_MATH" : "YES",

        "PRODUCT_NAME" : "widget",

        "SWIFT_EMIT_LOC_STRINGS" : "YES",

        "SWIFT_VERSION" : "5.0",
        "TARGETED_DEVICE_FAMILY" : "\"1,2\"",

        "MTL_ENABLE_DEBUG_INFO" : "NO",
        "SWIFT_OPTIMIZATION_LEVEL" : "\"-O\"",
        "COPY_PHASE_STRIP": "NO",
        "SWIFT_COMPILATION_MODE": "wholemodule"
    },

    "targetNamedBuildConfigurationProperties": {
        "debug": {
            "DEBUG_INFORMATION_FORMAT" : "dwarf",
            "GCC_PREPROCESSOR_DEFINITIONS": "(\"DEBUG=1\",\"$(inherited)\",)",
            "MTL_ENABLE_DEBUG_INFO" : "INCLUDE_SOURCE",
            "SWIFT_ACTIVE_COMPILATION_CONDITIONS" : "DEBUG",
            "SWIFT_OPTIMIZATION_LEVEL" : "\"-Onone\""
        },
        "release": {
            "CODE_SIGN_STYLE" : "Manual",
            "MTL_ENABLE_DEBUG_INFO" : "NO",
            "SWIFT_OPTIMIZATION_LEVEL" : "\"-O\"",
            "COPY_PHASE_STRIP": "NO",
            "SWIFT_COMPILATION_MODE": "wholemodule"
        }
    }
}
NOTE: These values are taken from the platforms/ios pbxproject file for the extension target, different extension types may have different values.
Run the app with ns run ios
You can now add the home screen widget that you have created to the home screen.
Signing your app for release
As mentioned above, extensions require their own App Identifier and Provisioning Profile, so to correctly sign your app for distribution:
Create two App Identifiers:
- One for the app, e.g.
org.nativescript.ExtensionApp - One for the extension, which by convention is the name of the extension (
widget) appended to the host applicaiton identifier, e.g.org.nativescript.ExtensionApp.widget
Then create two corresponding Provisioning Profiles.
Download the Provisioning Profiles in xcode.
Create a provisioning.json file
Create a new file App_Resources/iOS/extensions/provisioning.json with the contents
{
    "com.nativescript.ExtensionApp.widget": "<The name or UUID of the widget provisioning profile>"
}
Replacing the widget Application Identifier and Provisioning Profile UUID/Name with your own.
Build a release ipa
Now you can build a release version of the application for publishing with the command:
ns build ios --release --for-device --provision [Main App Profile Name/UUID] --env.production
Handle Entitlements
To demonstrate handling entitlements, we will share data between our app and the extension, In order to do this, we will utilize an Application Group.
Create an Application Group and give it the id group.<your app id> e.g. group.org.nativescript.ExtensionApp.
Add that App Group to both your main app and extension App ID Configuration ( if doing through the apple developer site, remember to regenerate the profiles).
Create a new file App_Resources/iOS/extensions/widget/widget.entitlements and add:
<?xml version="1.0" encoding="UTF-8"?>
<!DOCTYPE plist PUBLIC "-//Apple//DTD PLIST 1.0//EN" "http://www.apple.com/DTDs/PropertyList-1.0.dtd">
<plist version="1.0">
<dict>
	<key>com.apple.security.application-groups</key>
	<array>
		<string><!-- your group id --></string>
	</array>
</dict>
</plist>
Add the same content to App_Resources/iOS/app.entitlements
In App_Resources/iOS/extensions/widget/extension.json in the targetBuildConfigurationProperties section add:
"CODE_SIGN_ENTITLEMENTS": "../../App_Resources/iOS/extensions/widget/widget.entitlements",
Both the app, and widget should now be able to access items in the App Group.
Modify the app to pass values to the widget
We are going to use UserDefaults to pass data between the app and the widget.
Modify the file app/main-view-model.ts and add the following to the HelloWorldModel class:
  private getGroupId(): string {
        return "group." + NSBundle.mainBundle.bundleIdentifier;
  }
  private readonly VALUE_KEY="COUNTER";
  private updateSharedValue(){
      const defaults=NSUserDefaults.alloc().initWithSuiteName(this.getGroupId());
      defaults.setObjectForKey(this._counter.toString(), this.VALUE_KEY);
  }
Add a call to this.updateSharedValue(); to the end of the onTap() method of the HelloWorldModel class.
Modify the widget to read values passed from the app
Modify the widget code to read from the UserDefaults by replacing the contents of App_Resources/iOS/extensions/widget/widget.swift with:
import WidgetKit
import SwiftUI

struct Provider: TimelineProvider {
    func placeholder(in context: Context) -> SimpleEntry {
        SimpleEntry(date: Date(), emoji: "😀")
    }

    func getSnapshot(in context: Context, completion: @escaping (SimpleEntry) -> ()) {
        let entry = SimpleEntry(date: Date(), emoji: "😀")
        completion(entry)
    }
    private func getGroupId() -> String {
        var result: String = ""
        if let bundleIdentifier = Bundle.main.bundleIdentifier {
            let replacedString = bundleIdentifier
                .replacingOccurrences(of: ".widget", with: "")
            result = "group." + replacedString
        }
        return result;
    }

    func getTimeline(in context: Context, completion: @escaping (Timeline<Entry>) -> ()) {
        var entries: [SimpleEntry] = [];
        var count = UserDefaults(suiteName: getGroupId())!.string(forKey: "COUNTER");
        // Generate a timeline consisting of five entries an hour apart, starting from the current date.
        let currentDate = Date()
        for hourOffset in 0 ..< 5 {
            let entryDate = Calendar.current.date(byAdding: .hour, value: hourOffset, to: currentDate)!
            let entry = SimpleEntry(date: entryDate, emoji: "😀", count: count ?? "")

            entries.append(entry)
        }

        let timeline = Timeline(entries: entries, policy: .atEnd)
        completion(timeline)
    }
}

struct SimpleEntry: TimelineEntry {
    let date: Date
    let emoji: String
    var count: String = ""
}

struct widgetEntryView : View {
    var entry: Provider.Entry

    var body: some View {
        VStack {
            Text("Time:")
            Text(entry.date, style: .time)

            Text("Emoji:")
            Text(entry.emoji + " " + entry.count)

        }
    }
}

struct widget: Widget {
    let kind: String = "widget"

    var body: some WidgetConfiguration {
        StaticConfiguration(kind: kind, provider: Provider()) { entry in
            if #available(iOS 17.0, *) {
                widgetEntryView(entry: entry)
                    .containerBackground(.fill.tertiary, for: .widget)
            } else {
                widgetEntryView(entry: entry)
                    .padding()
                    .background()
            }
        }
        .configurationDisplayName("My Widget")
        .description("This is an example widget.")
    }
}

#Preview(as: .systemSmall) {
    widget()
} timeline: {
    SimpleEntry(date: .now, emoji: "😀")
    SimpleEntry(date: .now, emoji: "🤩")
}
Trigger an update of the widget from the App
With the above the widget will update periodically with the latest result of the tap event in the app, but we would rather the widget update immediately.
To achieve this, we need to call the relevant method of WidgetKit to trigger an update, WidgetKit is not accessible by default from TypeScript, so we must create a swift utility class.
Create the file App_Resources/iOS/src/utility.swift with contents:
import Foundation
import WidgetKit

@objcMembers
@objc(NSCUtilsHelper)
public class NSCUtilsHelper: NSObject {

    public static func updateWidget(){
        if #available(iOS 14.0, *) {
            Task.detached(priority: .userInitiated) {
                WidgetCenter.shared.reloadAllTimelines()
            }
        }
    }

}
Create the file types/objc!nsswiftsupport.d.ts with contents:
declare class NSCUtilsHelper extends NSObject {

	static alloc(): NSCUtilsHelper; // inherited from NSObject

	static new(): NSCUtilsHelper; // inherited from NSObject

	static updateWidget(): void;
}
Add the following line to references.d.ts:
/// <reference path="./types/objc!nsswiftsupport.d.ts" />
And finally add the following line to the updateSharedValue method in app/main-view-model.ts:
NSCUtilsHelper.updateWidget();
Now when you click on the Tap Button, the widget will reflect the counter displayed in the app.
Some Notes
- If the data being passed to the widget from the app is a secret, use the keychain to share the data.
- When publishing a new version the CURRENT_PROJECT_VERSION and MARKETING_VERSION for the widget need to match the parent app version.